Getting Data from the VIVE Wrist Tracker
Overview
VIVE OpenXR plugin provides the wrist tracker feature. I’m going to show you how to use the VIVE XR Wrist Tracker profile. This profile allows your apps to receive useful data provided by the VIVE Wrist Tracker.
Supported Platforms and devices
| Platform | Headset | Supported | |
| PC | PC Streaming | Focus3/ XR Elite | X |
| Pure PC | Vive Cosmos | X | |
| Vive Pro series | X | ||
| AIO | Focus3/ XR Elite | V | |
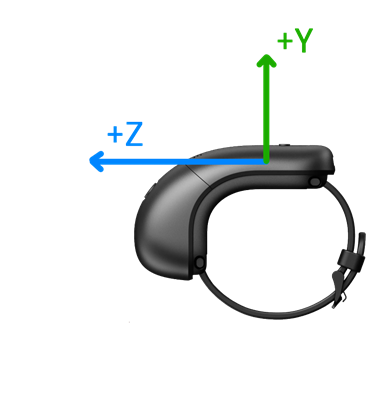
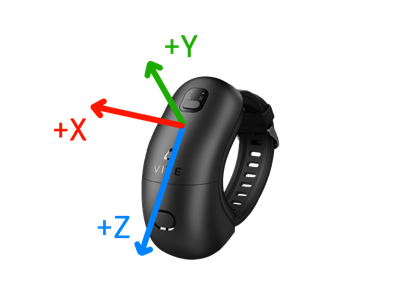
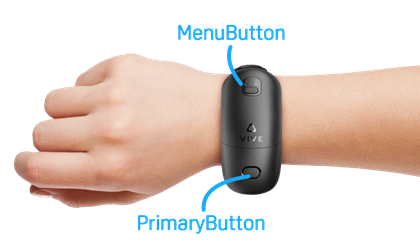
As shown in the following, VIVE Wrist Tracker provides the pose of the tracker and input of the menu and primary buttons.
This profile can be used in different cases.
In the following, let’s see how to use this VIVE XR Wrist Tracker profile.
Step 1. Add the VIVE XR Wrist Tracker Profile
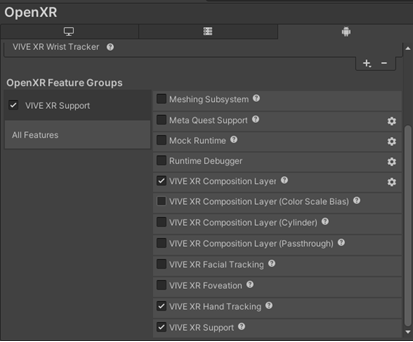
To use the Wrist Tracker profile, simply add the VIVE XR Wrist Tracker profile in Edit > Project Setting > XR Plug-In Management > OpenXR.
Step 2. Use the feature through an action map
In any action map, you can use the VIVE XR Wrist Tracker profile data as follows.
-
primaryButton: indicates the press state of primary button.
Path: <ViveWristTracker>{RightHand}/primaryButton (or LeftHand)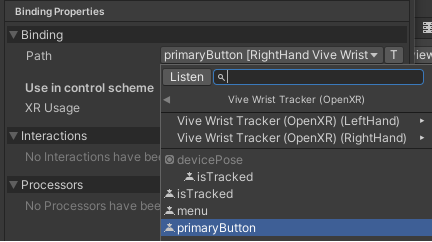
-
Menu: indicates the press state of left wrist tracker menu button.
Path: <ViveWristTracker>{LeftHand}/menu (only LeftHand has menu)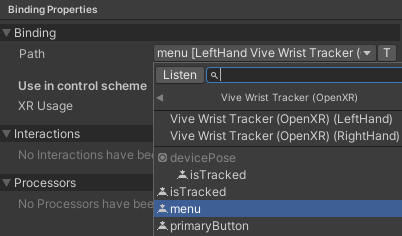
-
devicesPose: indicates the pose of the tracker.
Path: <ViveWristTracker>{RightHand}/devicePose (or LeftHand)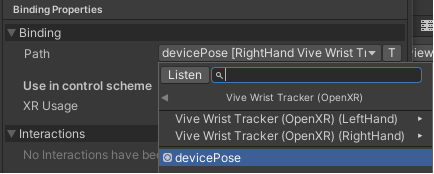
-
devicesPose/isTracked: indicates whether the tracker is tracked or not.
Path: <ViveWristTracker>{RightHand}/devicePose/isTracked (or LeftHand)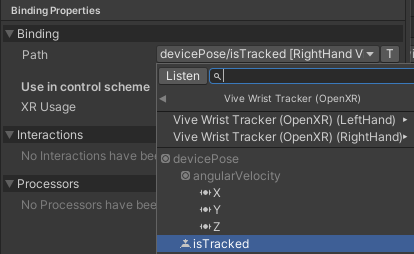
-
devicePose/trackingState: indicates the InputTrackingState of wrist tracker.
Path: <ViveWristTracker>{RightHand}/devicePose/trackingState (or LeftHand)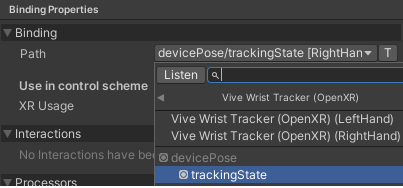
If you aren’t familiar with how to use action maps, go check to the basic input.