Getting Data from VIVE XR Tracker (Beta)
VIVE OpenXR Unity plugin supports the VIVE XR Tracker. By following this guide, you can retrieve the tracking data of VIVE Ultimate Tracker.
Supported Platforms and Devices
| Platform | Headset | Supported | Plugin Version | |
| PC | PC Streaming | Focus 3/XR Elite/Focus Vision | X *2 | |
| Pure PC | Vive Cosmos | X *2 | ||
| Vive Pro series | X *2 | |||
| AIO | Focus 3 | V *1 | 2.2.0 and above | |
| XR Elite | V *1 | 2.2.0 and above | ||
| Focus Vision | V *1 | 2.2.0 and above | ||
*1:
VIVE Focus3
supports pose only.
VIVE XR Elite
supports the pose feature in ROM 1.0.999.540 or newer and button feature in ROM 1.0.999.680 or newer.
*2: There is another
plugin
to support Vive XR Tracker as
Vive Tracker
in Unity Engine. Please visit it to use Vive XR Tracker for PC experience.
Specification
This chapter will explore how to create more immersive experiences using the VIVE XR Tracker feature within the XR_HTC_vive_xr_tracker_interaction extension.
Environment Settings
In the following, let’s see how to use this VIVE XR Tracker profile. You can check overall VIVE XR Tracker data defined in the Input Device VIVE XR Tracker(OpenXR) from menu item Window > Analysis > Input Debugger.
![]()
To use the VIVE XR Tracker , simply enable VIVE XR - Interaction Group, click the settings button on the right-hand side, and then enable vive XR Tracker as the image below.
Golden Sample
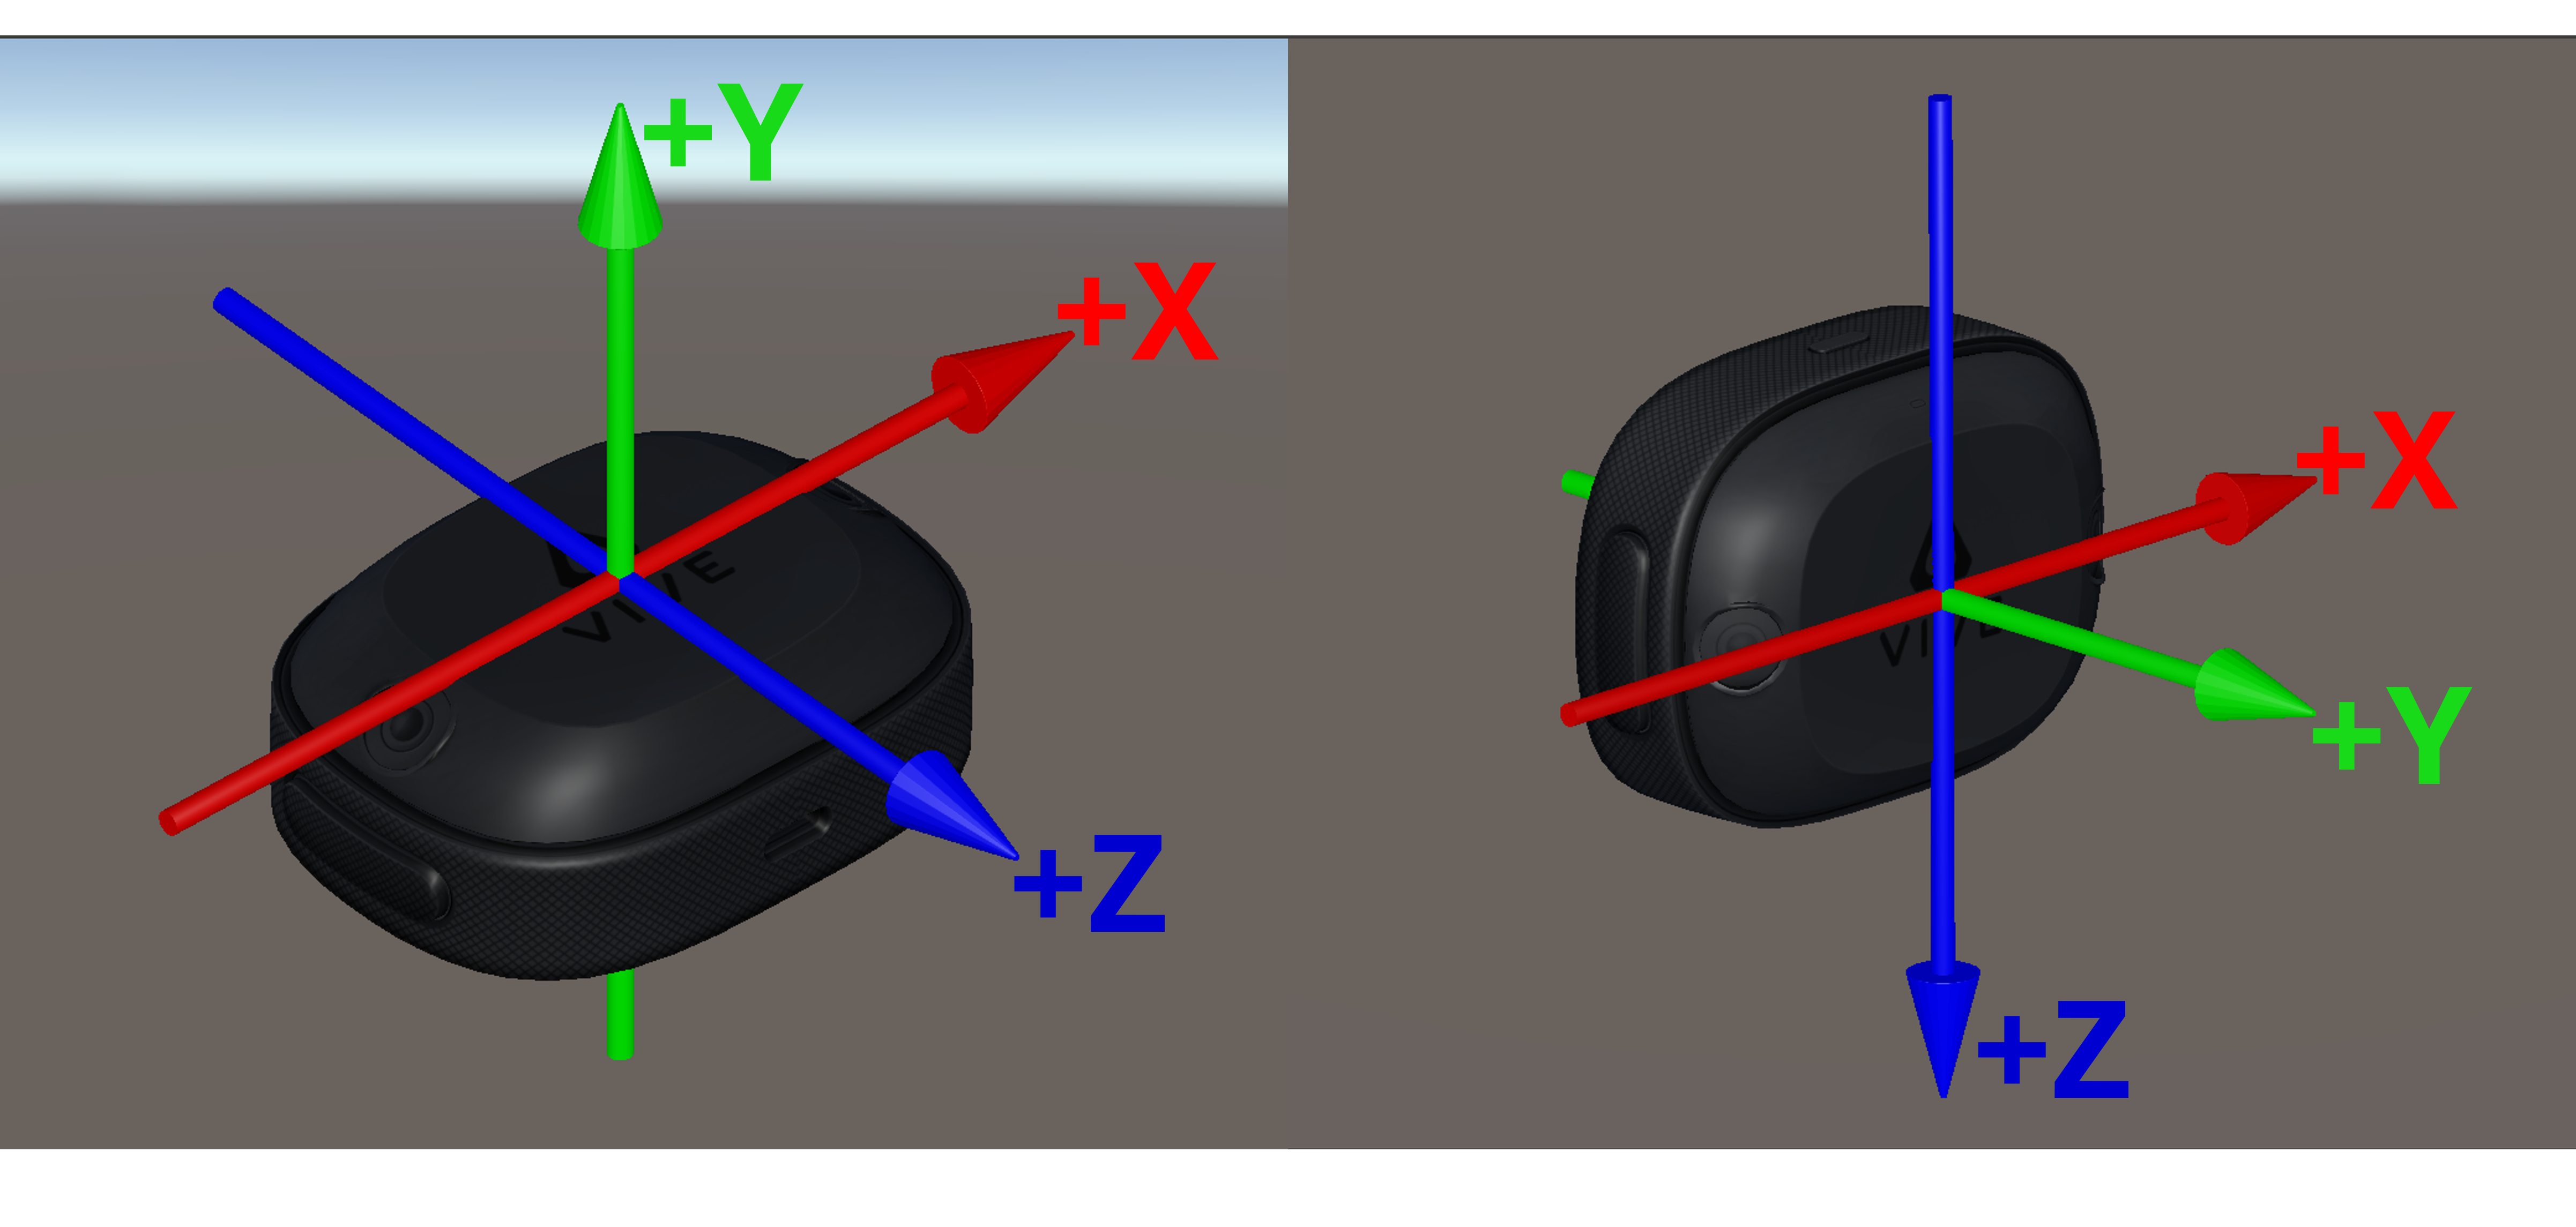
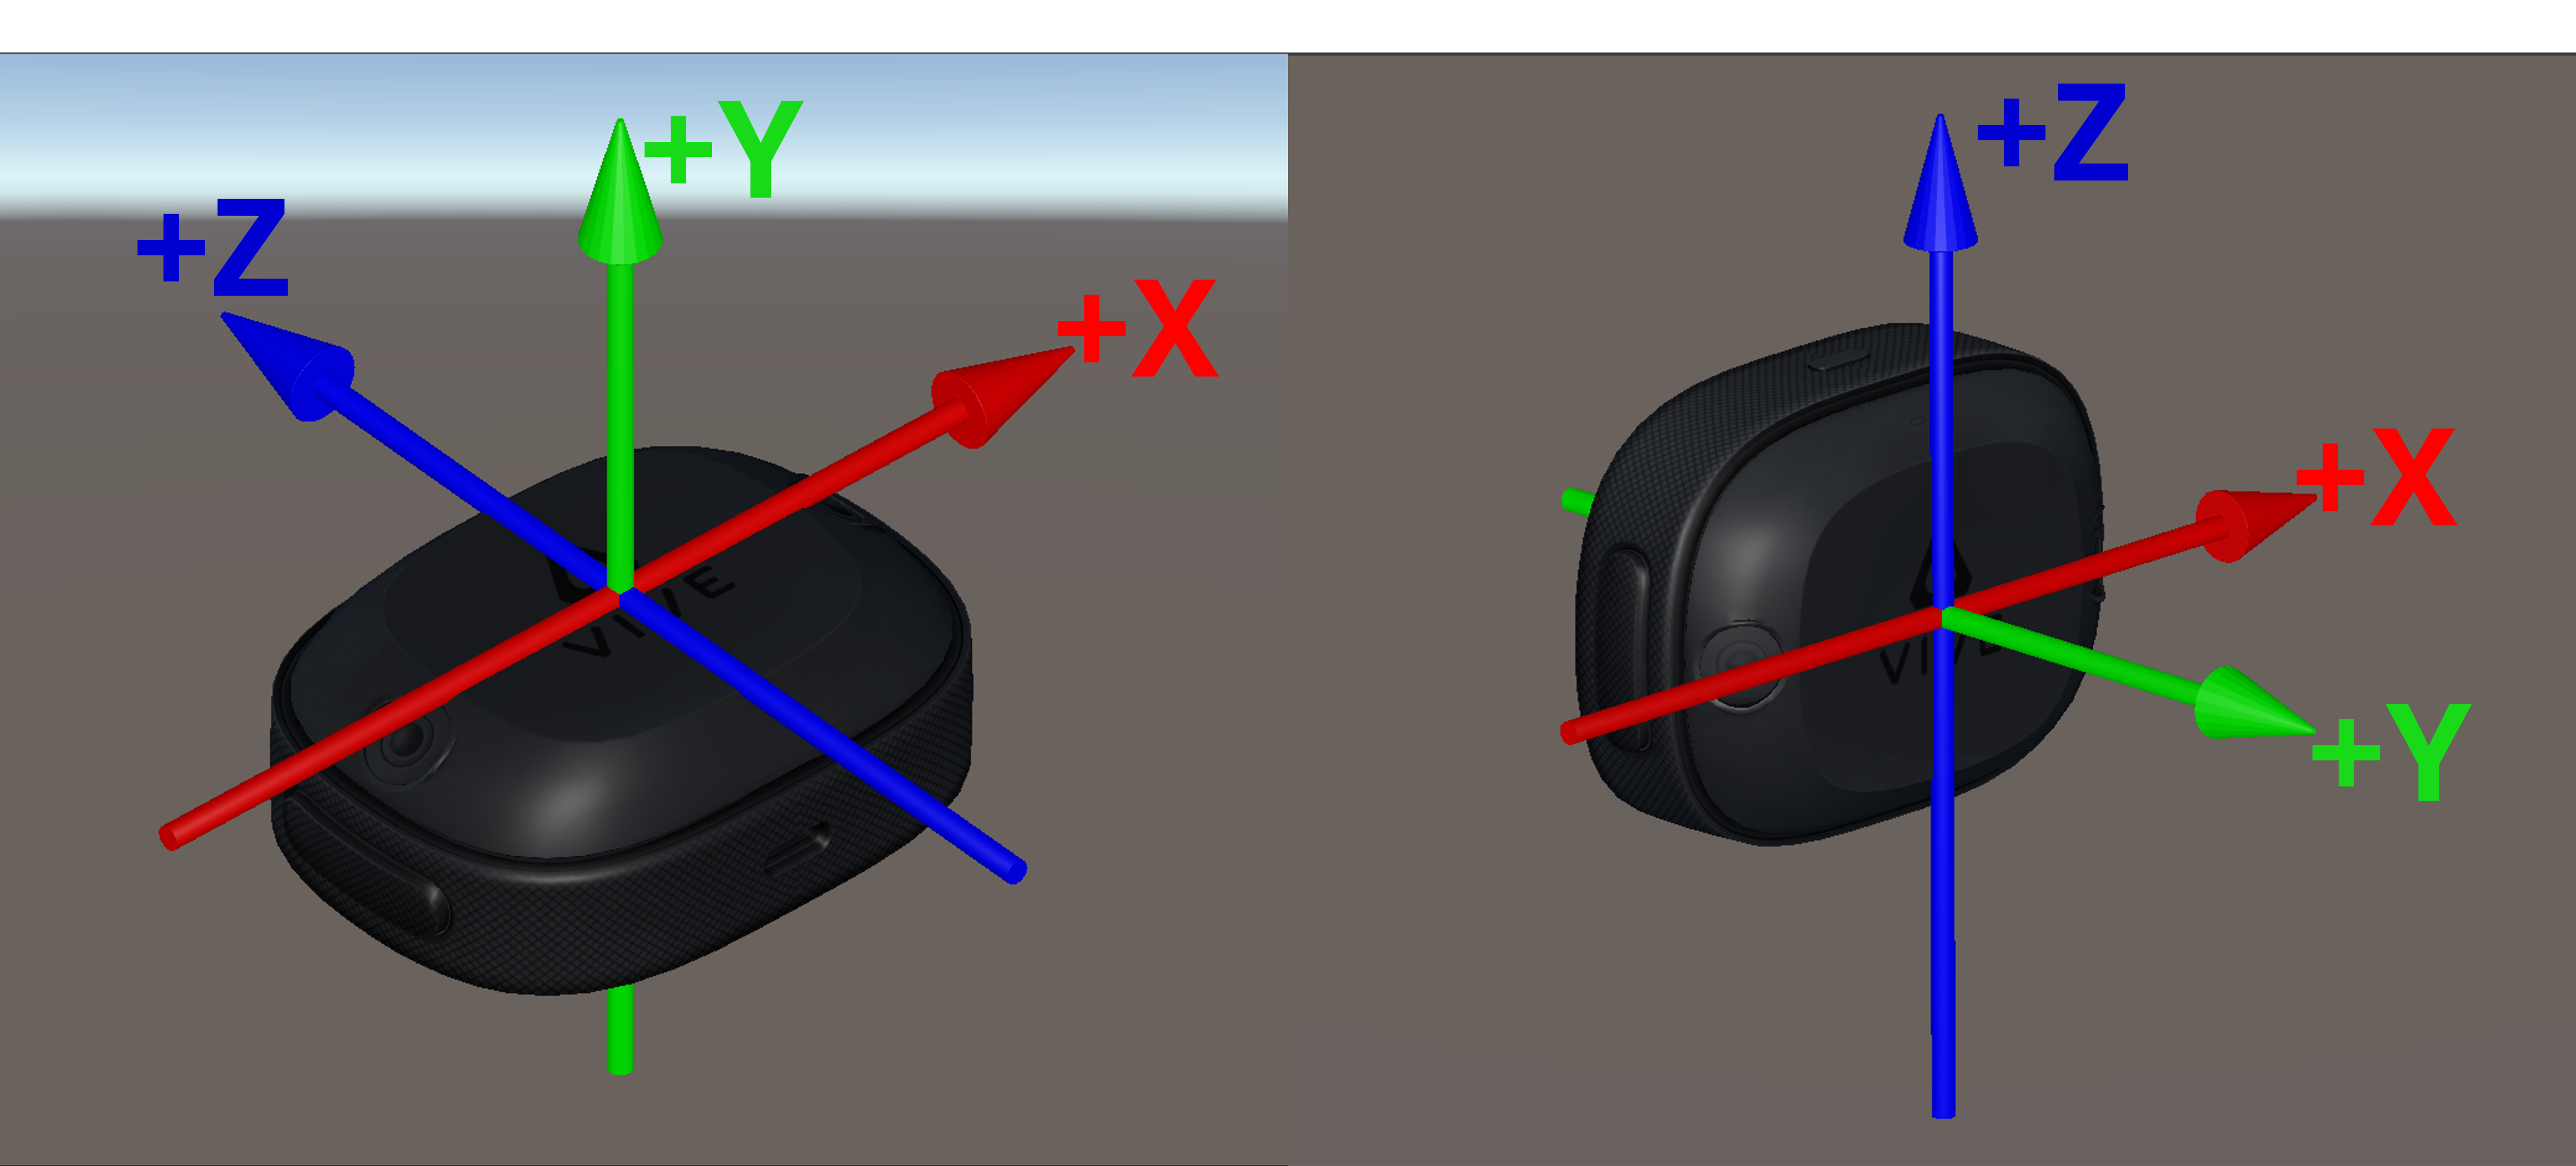
This profile can be used in different cases. In the following, let’s see how to use this VIVE XR Tracker profile. As shown in the following, VIVE XR Tracker provides the pose of the tracker.
- OpenXR Coordinate:
- Unity Coordinate:
Binding the VIVE XR Tracker data path
We have already created Action Maps for Vive XR Tracker.(Assets > Samples > VIVE OpenXR Plugin > {version} > VIVE OpenXR Samples > Samples > Commons > ActionMap.)
For Android platform, the number of trackers that can be used is limited to 5. You can use Action Maps mentioned aboved directly and no need to add binding path yourself.
For PC platform, the number of trackers that can be used is extended to 20, so you could add more binding path to Action Maps as needed.
Add “XR Tracker” to Action Maps and “TrackerIsTracked0” to Actions. Configure the action's Action Type and Control Type.
![]()
Add Binding for action "isTracked".
![]()
![]()
![]()
![]()
You can refer to the binding paths of VIVE XR Tracker below.
-
devicePosition: indicates the position of the tracker. (The same as devicePose/Position)
Path: <ViveXRTracker>{Ultimate Tracker id}/devicePosition (id:0,1,2,3,4) -
deviceRotation: indicates the rotation of the tracker. (The same as devicePose/rotation)
Path: <ViveXRTracker>{Ultimate Tracker id}/deviceRotation (id:0,1,2,3,4) -
isTracked: indicates whether the tracker is tracked or not. (The same as devicePose/isTracked)
Path: <ViveXRTracker>{Ultimate Tracker id}/isTracked (id:0,1,2,3,4) -
trackingState: indicates the InputTrackingState of tracker. (The same as devicePose/trackingState)
Path: <ViveXRTracker>{Ultimate Tracker id}/trackingState (id:0,1,2,3,4) -
gripPress: indicates the grip button is pressed or not. (The same as devicePose/gripPress)
Path: <ViveXRTracker>{Ultimate Tracker id}/gripPress (id:0,1,2,3,4) -
menu: indicates the menu button is pressed or not. (The same as devicePose/menu)
Path: <ViveXRTracker>{Ultimate Tracker id}/menu (id:0,1,2,3,4) -
trackpadPress: indicates the trackpad is pressed or not. (The same as devicePose/trackpadPress)
Path: <ViveXRTracker>{Ultimate Tracker id}/trackpadPress (id:0,1,2,3,4) -
triggerPress: indicates the trigger is pressed or not. (The same as devicePose/triggerPress)
Path: <ViveXRTracker>{Ultimate Tracker id}/triggerPress (id:0,1,2,3,4)
![]()
Demonstration of VIVE XR Tracker
The following example demonstrates how to create a VR environment, establish a trackable XR Tracker, and verify that all functionalities of the XR Tracker are operating correctly in Unity.
VR Enviroment Setup
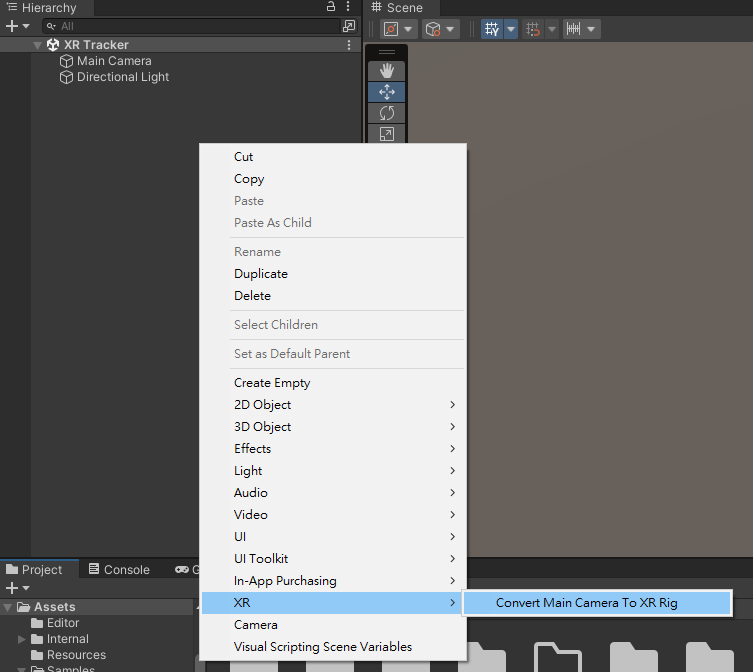
- Open an empty scene and convert main camera to XRRig.
Add XR Tracker
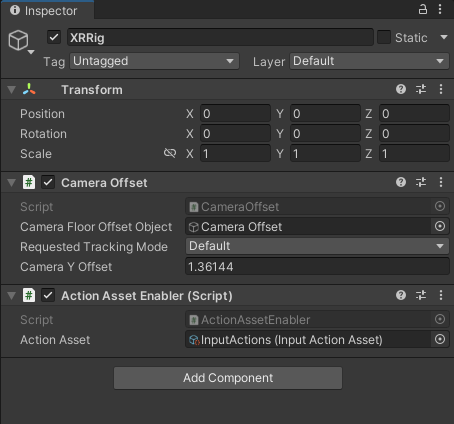
- Add the Action Asset Enabler script to XRRig and assign the InputAction to
Action Asset. You can find InputAction in Assets > Samples > VIVE OpenXR Plugin > {version} > VIVE OpenXR Samples > Samples > Commons > ActionMap.

-
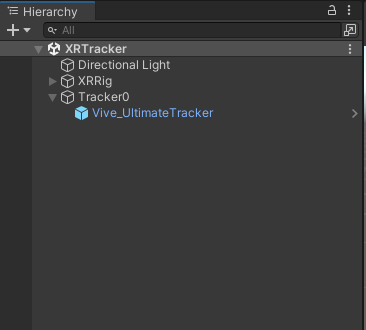
Create an empty GameObject named Tracker0.

-
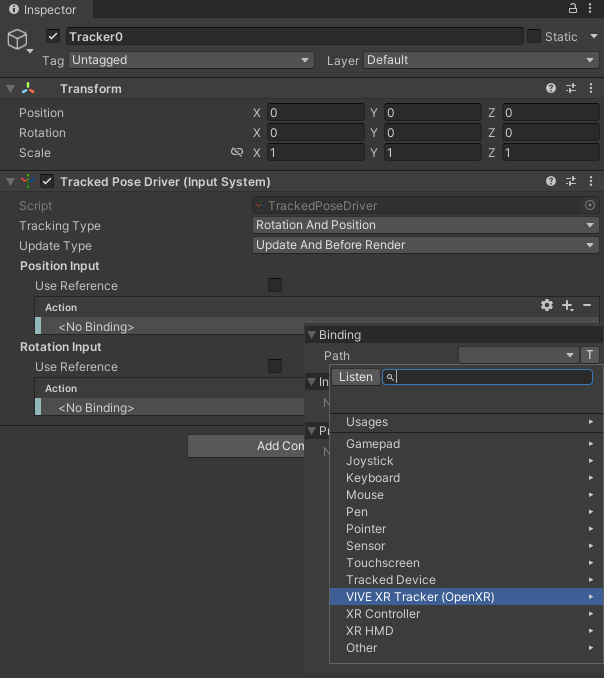
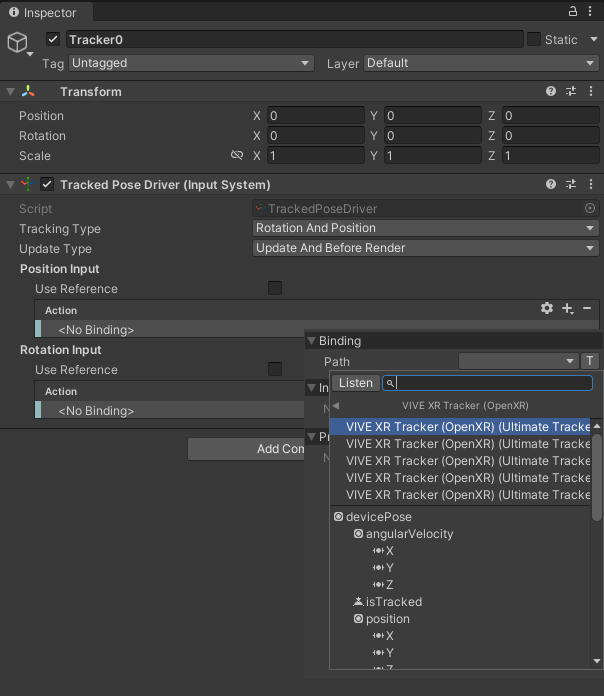
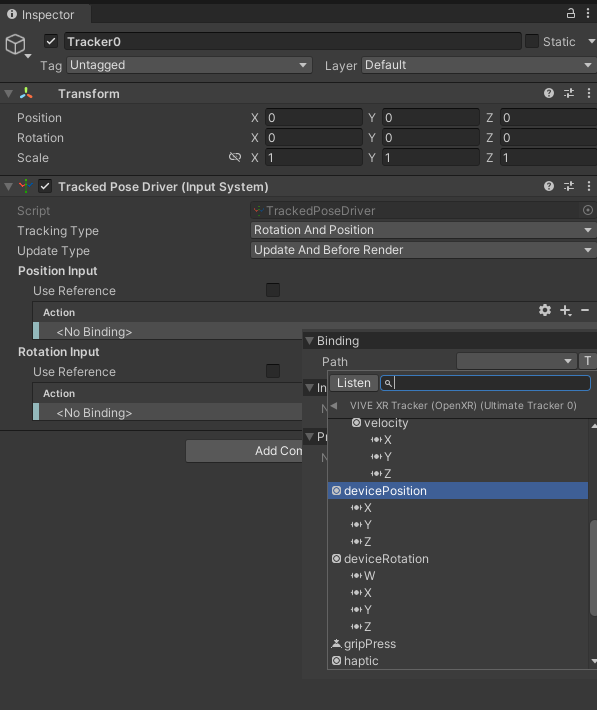
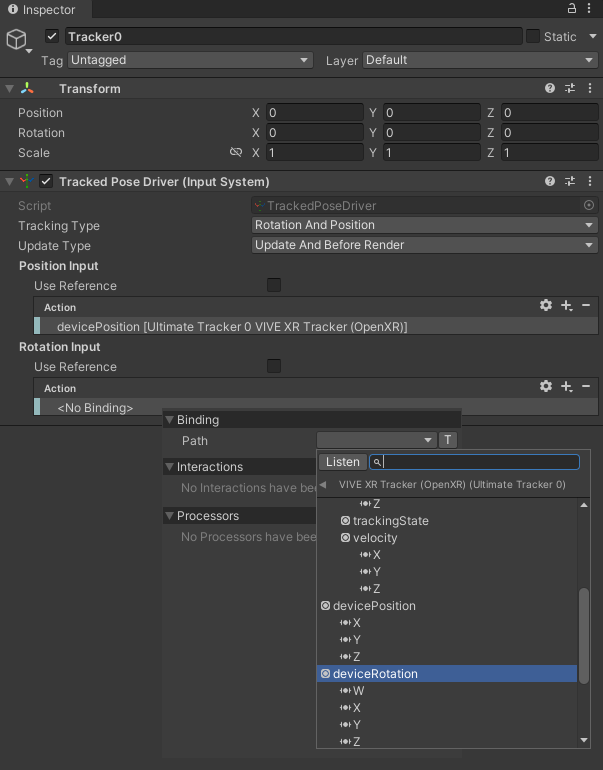
Add the Tracked Pose Driver script to Tracker0 and configure the
Position InputandRotation Inputactions.-
Add Position Input
-
Add Rotation Input
-
-
Drag and drop Vive_UltimateTracker prefeb as the child of Tracker0.

Create UI Canvas to show information
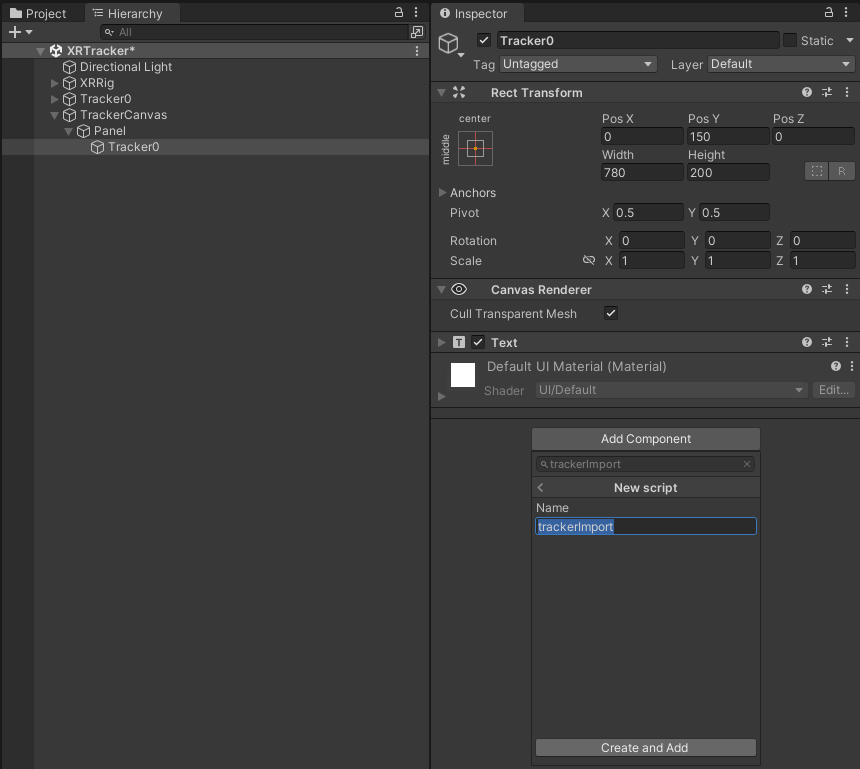
- Add a Canvas “TrackerCanvas” with a Text “Tracker0”.
-
Create and add a script named “TrackerImport” to “Tracker0”.
-
Using Namespace.
namespace VIVE.OpenXR.Samples.OpenXRInput
- Declare Variables.
[SerializeField]
private string m_TrackerName = "";
public string TrackerName { get { return m_TrackerName; } set { m_TrackerName = value; } }

[SerializeField]
private InputActionReference m_IsTracked = null;
public InputActionReference IsTracked { get { return m_IsTracked; } set { m_IsTracked = value; } }

[SerializeField]
private InputActionReference m_TrackingState = null;
public InputActionReference TrackingState { get { return m_TrackingState; } set { m_TrackingState = value; } }

[SerializeField]
private InputActionReference m_Position = null;
public InputActionReference Position { get { return m_Position; } set { m_Position = value; } }

[SerializeField]
private InputActionReference m_Rotation = null;
public InputActionReference Rotation { get { return m_Rotation; } set { m_Rotation = value; } }

[SerializeField]
private InputActionReference m_Menu = null;
public InputActionReference Menu { get { return m_Menu; } set { m_Menu = value; } }

[SerializeField]
private InputActionReference m_GripPress = null;
public InputActionReference GripPress { get { return m_GripPress; } set { m_GripPress = value; } }

[SerializeField]
private InputActionReference m_TriggerPress = null;
public InputActionReference TriggerPress { get { return m_TriggerPress; } set { m_TriggerPress = value; } }

[SerializeField]
private InputActionReference m_TrackpadPress = null;
public InputActionReference TrackpadPress { get { return m_TrackpadPress; } set { m_TrackpadPress = value; } }

[SerializeField]
private InputActionReference m_TrackpadTouch = null;
public InputActionReference TrackpadTouch { get { return m_TrackpadTouch; } set { m_TrackpadTouch = value; } }

private Text m_Text = null;

private void Start()
{
        m_Text = GetComponent<Text>();
}
5. Update status of all features with UI text.void Update() { if (m_Text == null) { return; } m_Text.text = m_TrackerName; m_Text.text += " isTracked: "; { if (Utils.GetButton(m_IsTracked, out bool value, out string msg)) { m_Text.text += value; } else { m_Text.text += msg; } } m_Text.text += "\n"; m_Text.text += "trackingState: "; { if (Utils.GetInteger(m_TrackingState, out InputTrackingState value, out string msg)) { m_Text.text += value; } else { m_Text.text += msg; } } m_Text.text += "\n"; m_Text.text += "position ("; { if (Utils.GetVector3(m_Position, out Vector3 value, out string msg)) { m_Text.text += value.x.ToString() + ", " + value.y.ToString() + ", " + value.z.ToString(); } else { m_Text.text += msg; } } m_Text.text += ")\n"; m_Text.text += "rotation ("; { if (Utils.GetQuaternion(m_Rotation, out Quaternion value, out string msg)) { m_Text.text += value.x.ToString() + ", " + value.y.ToString() + ", " + value.z.ToString() + ", " + value.w.ToString(); } else { m_Text.text += msg; } } m_Text.text += ")"; m_Text.text += "\nmenu: "; { if (Utils.GetButton(m_Menu, out bool value, out string msg)) { m_Text.text += value; } else { m_Text.text += msg; } } m_Text.text += "\ngrip: "; { if (Utils.GetButton(m_GripPress, out bool value, out string msg)) { m_Text.text += value; } else { m_Text.text += msg; } } m_Text.text += "\ntrigger press: "; { if (Utils.GetButton(m_TriggerPress, out bool value, out string msg)) { m_Text.text += value; if (Utils.PerformHaptic(m_TriggerPress, out msg)) { m_Text.text += ", Vibrate"; } else { m_Text.text += ", Failed: " + msg; } } else { m_Text.text += msg; } } m_Text.text += "\ntrackpad press: "; { if (Utils.GetButton(m_TrackpadPress, out bool value, out string msg)) { m_Text.text += value; } else { m_Text.text += msg; } } m_Text.text += "\ntrackpad touch: "; { if (Utils.GetButton(m_TrackpadTouch, out bool value, out string msg)) { m_Text.text += value; } else { m_Text.text += msg; } } }
6. Add Input Action Reference as image below to the script.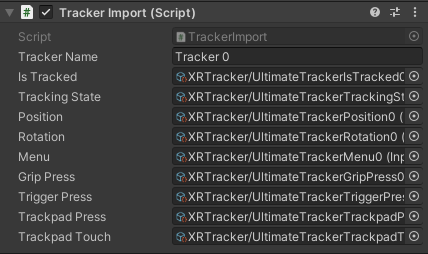
Finally, build and run the scene.
See Also
- If you aren’t familiar with how to use action maps, please refer to the basic input.
Open source project