How to Install VIVE OpenXR Plugin-npm
⚠ NOTICE |
|
This legacy plugin is no longer being updated and maintained, please develop mobile content with OpenXR 2-in-1 Unity / Unreal package . |
How to install VIVE OpenXR Android Plugin:
-
Download
VIVE OpenXR Android unitypackage
-
Import the unitypackage file in the Unity editor.
How to import : Unity tutorial
-
Select the menu on the Unity UI "VIVE/OpenXR Android Installer", press "Install or Update latest version".

-
For "Install specific version",
Step 1 : Copy the release version from Here
Step 2 : Paste the versionto install the specific version. (For example: "1.0.5")
If you can't find the version we provide on github, please refer the following tutorial to download:
Prerequisite: Unity Versions 2020.3.15f2, 2020.3.30f1 and 2021.3.3f1 are verified and recommended.
How to Install VIVE OpenXR Plugin
Step 1. Register source server
- From menu Edit > Project Settings
- Select Package Manager
- Input VIVE Registry
|
Name |
VIVE |
|
URL |
https://npm-registry.vive.com |
|
Scope |
com.htc.upm |
|
Note All space in “URL” and “Scope(s)” must be trimmed |
|
-
Apply the change

Step 2. Install VIVE OpenXR Feature
From menu: Window > Package Manager
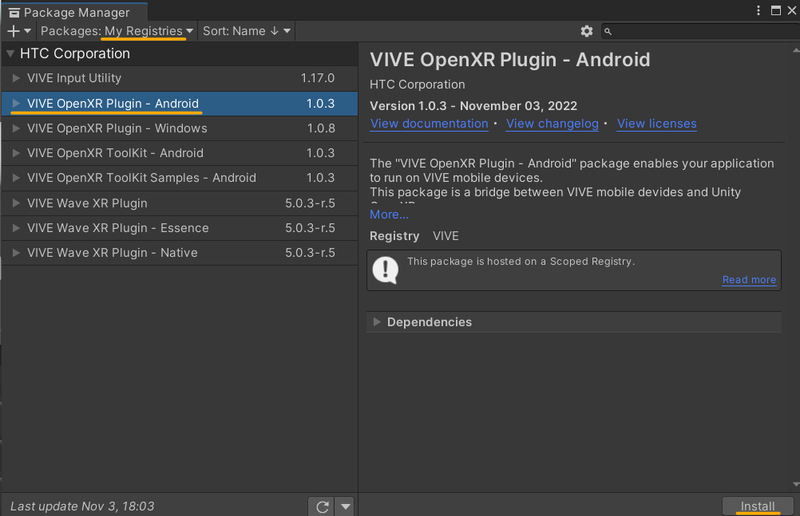
( Note: The version of the plugin available on your package manager may be different from the one in the screenshot, select the latest version or any version that suits your needs.)
-
- InputSystem 1.3.0
- XR Plugin Management 4.2.1
- OpenXR Plugin 1.3.1
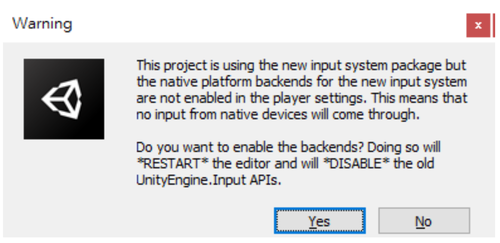
Note:
After installing the plugin, you have to
change the Project settings
of Unity.
For details on how to setup the project, please visit
Documentation