VIVE Wrist Trackers Unreal Engine Getting Started
What will you learn?
You will learn to use the VIVE Wrist Tracker with Vive Focus 3 all in one headset. This article will cover all the required steps to get you started with the VIVE Wrist Tracker using Unreal Engine and the VIVE Wave SDK.
Note : In this tutorial we will use Unreal Engine 4.26, Vive Focus 3 and a pair of Wrist Trackers .
This tutorial assumes you are familiar with the VIVE Wave SDK .
What is the VIVE Wrist Tracker?
VIVE Wave™ Unreal plugin provides the Wrist Tracker feature. A Wrist Tacker component is a device where its location and orientation can be tracked.
Wear your VIVE Wrist Trackers
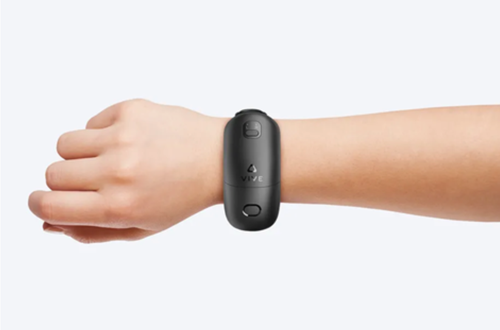
- The VIVE Wrist Tracker fits like a watch around a user’s arm. Refer to the image below to wear correctly.
Setup your VIVE Wrist Trackers
Connect your VIVE Wrist Trackers
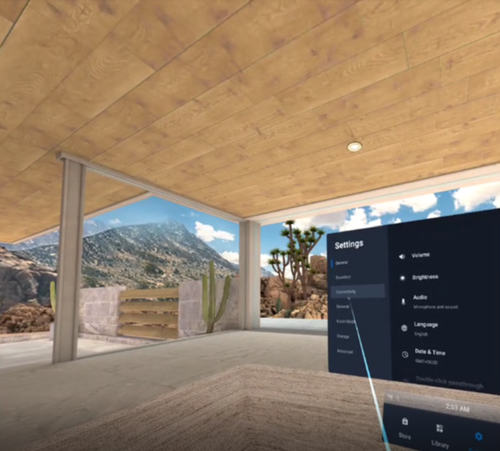
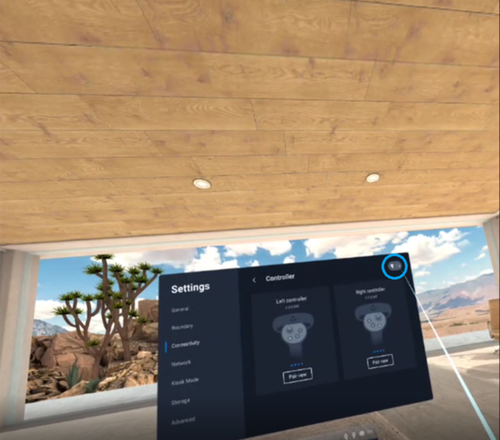
- Navigate to the Connectivity tab under Settings .
- Navigate to the Controller tab under the Connectivity tab
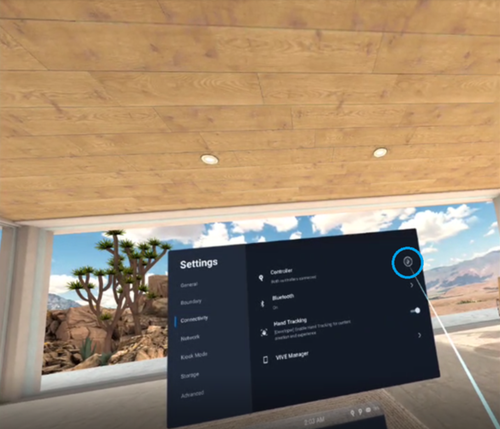
- Click on the Controller / Tracker icon to switch from Controller mode to Wrist Tracker mode and vice versa.
- Press on continue to Unpair your controllers.
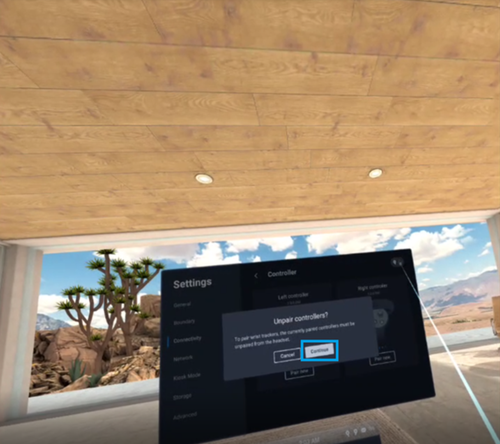
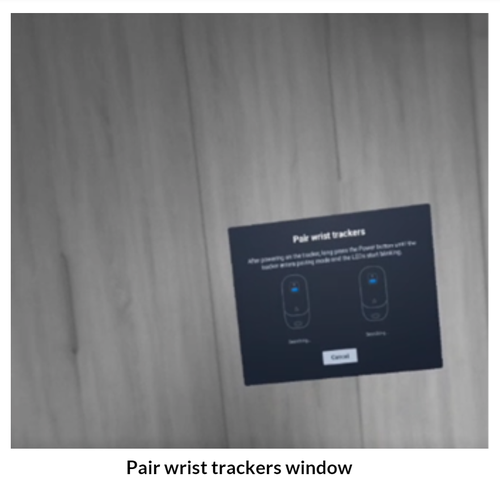
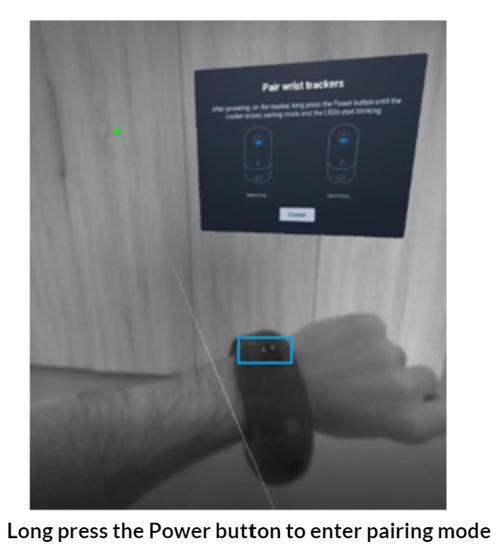
- Once in passthrough mode you will see the below Pair wrist trackers window.
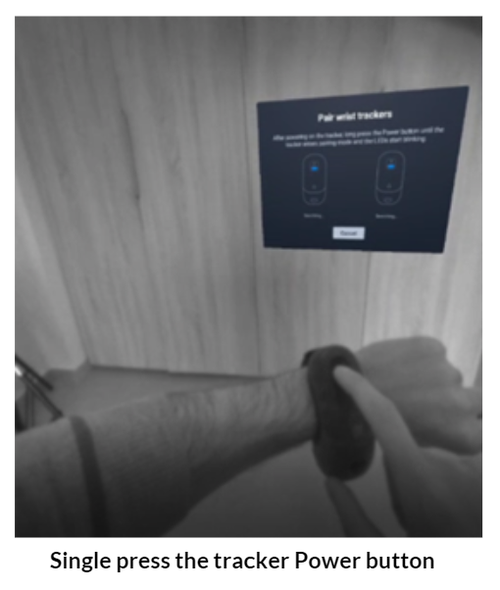
5.2 Once your tracker is ON , long press the Power button until the tracker enters pairing mode ( ~2 sec ) and LEDs start blinking.
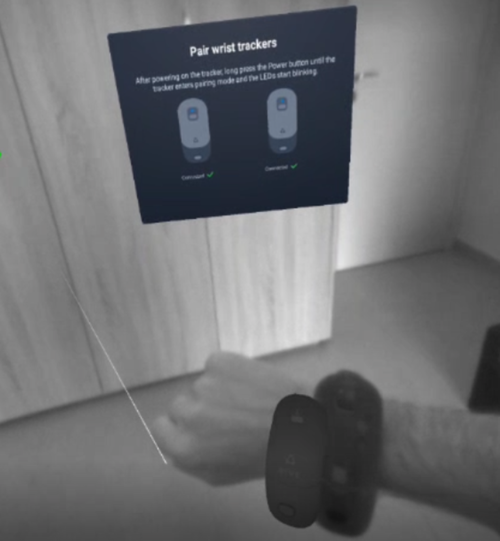
- Repeat Step 5 for the other tracker. Once the trackers are paired you will be able to see the wrist tracker 3D model on your wrist.
- If you are using the wrist trackers with hand tracking you will need to click on the calibrate button else click on I’m not using it for hand tracking and skip step 8 .
Note: You will need to use the Pinch gesture to select either of the two buttons.
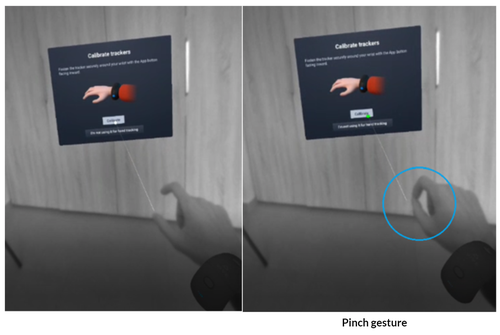
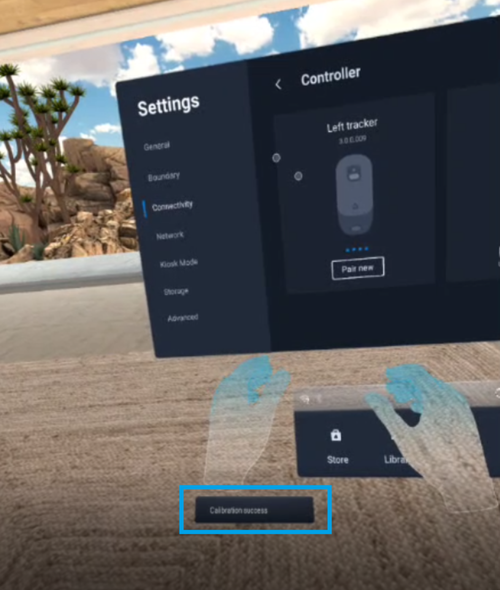
- Calibrate wrist trackers to use with hand tracking. (This step will only show if you chose to use the wrist tracker with hand tracking and clicked on calibrate the step 7 )
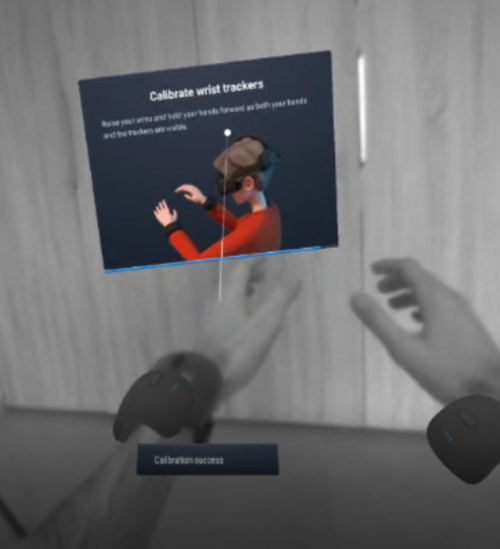
- Once you completed all the previous step you should see that a notification indicating Calibration success
Project Settings
Make sure the following WaveVR options have been set in your project settings to enable both Tracker and hand tracking.

How to set up VRPawn
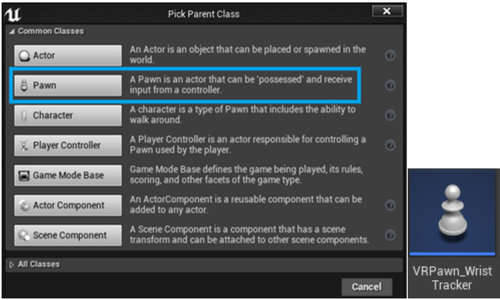
- Create a Blueprint Class of type Pawn and call it VRPawn_WristTracker
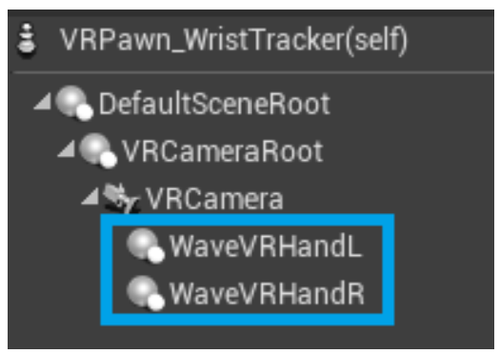
- Add WaveVR Hand component to show the tracked hands (You will need to add for both Right and Left hands)
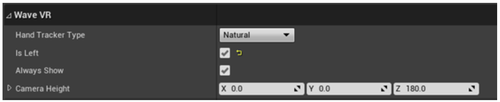
- Setup you WaveVR hand component (Left hand example below do the same for the right hand)
3.1 - Set the skeletal mesh. (Use WVRRightHand_1106_ASCII for right hand)

3.2 - Set Hand Tracker Type as Natual
3.3 - Enable IsLeft only for left hand ( Disable for right hand)
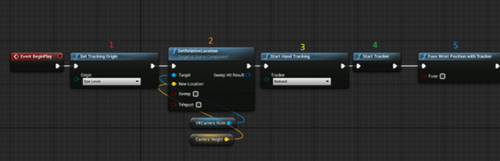
- Add the following code to your VR_Pawn_WristTracker BeginPlay function :
Create Your Tracker Actor
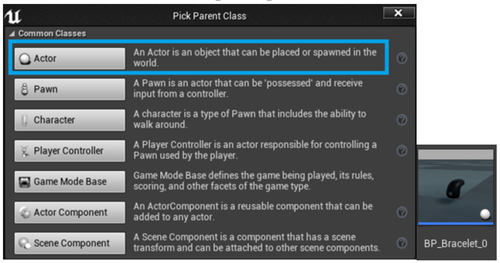
- Create a new actor class and call it BP_Bracelet_0
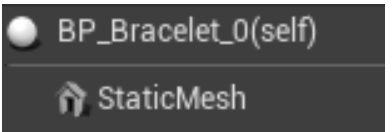
- Add the following code to your BP_Bracelet_0 Blueprint and set your static mesh:
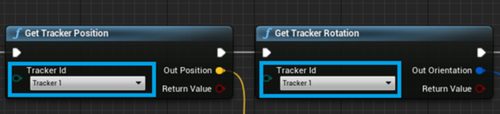
- Add the following code to your BP_Bracelet_0 Blueprint :
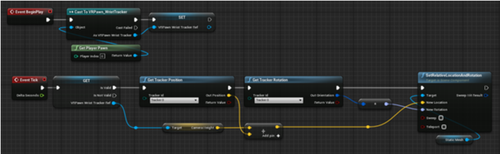
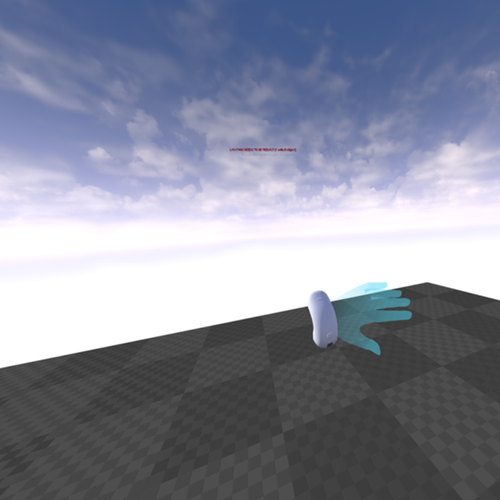
The above code is getting the current tracker position and rotation and setting the BP_Bracelet_0 Static Mesh Component position and rotation accordingly for visual representation.
- Repeat step 3 and call it BP_Bracelet_1 and use Tracker 1 instead of Tracker 0 for both Get Tracker Position and Get Tracker Rotation .
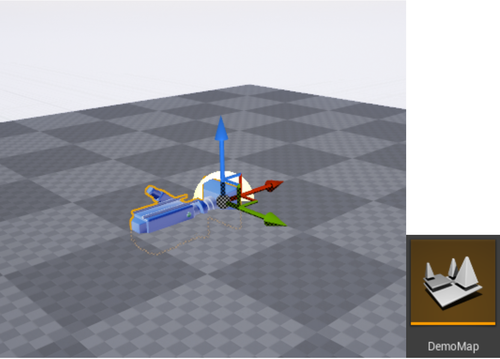
Create a Sample Map
- Create a new Level and place your VRPawn_WristTracker and add both BP_Bracelet_0 and BP_Bracelet_1 to the level.
- Build your project and make sure your tracker are On. In case they are Off single press the tracker Power button to turn it back on.