Button input binding
How do I use VIVE Wrist Tracker for hand tracking?
Follow these instructions to use VIVE Wrist Tracker for hand tracking.
- In the VIVE Business Streaming settings, select both Hand tracking and Use VIVE Wrist Tracker for hand tracking options.
Note: VIVE Business Streaming version must be 1.08 or later.
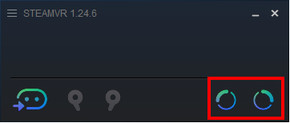
- Make sure the two VIVE Wrist Trackers are paired with the headset. The VIVE Wrist Trackers won't show in the SteamVR window as the trackers are used for hand tracking.
- Buttons on the VIVE Wrist Tracker will be interpreted as controller Y and B buttons to SteamVR. You'll need to bind the actions to vive_cosmos_controller's Y and B buttons in the input binding settings in SteamVR.
- Press the left VIVE Wrist Tracker Menu button to open the SteamVR dashboard and the right VIVE Wrist Tracker Menu button to open the app menu. The app won't receive these two button events.
How do I use VIVE Wrist Tracker as VIVE Tracker for Native or Unity?
Follow these instructions to use VIVE Wrist Tracker as VIVE Tracker for Native or Unity.
-
In the VIVE Business Streaming settings, clear the Hand tracking and Use VIVE Wrist Tracker for hand tracking options, and select Emulate VIVE Wrist Tracker as VIVE Tracker.
Note:
- VIVE Business Streaming version must be 1.08 or later.
- Clear the Hand tracking option if you want to use the tracker role HELD IN HAND in SteamVR.
-
Make sure the two VIVE Wrist Trackers are paired with the headset. Check that the VIVE Wrist Trackers are being tracked in the SteamVR window.

-
Open the SteamVR settings, and click Controllers > Manage Trackers.
-
For Tracker Role, choose a role that's a pair. For example, RIGHT FOOT and LEFT FOOT.

-
Click Close.
-
Click SHOW OLD BINDING UI, and then choose your application.
Note: Make sure the Advanced Settings are showing.
-
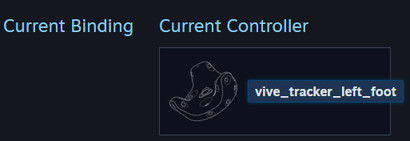
Under Current Controller, choose the tracker role that you defined in step 4. For example, vive_tracker_left_foot.

-
Bind the following:
- The Power button on the VIVE Wrist Tracker is defined as /input/power.
- The Menu button on the VIVE Wrist Tracker is defined as Menu.
Remember to set the bindings for both tracker roles.
How do I use VIVE Wrist Tracker as VIVE Tracker for Unreal Engine?
Follow these instructions to use VIVE Wrist Tracker as VIVE Tracker for Unreal Engine.
- In the VIVE Business Streaming settings, clear the Hand tracking and Use VIVE Wrist Tracker for hand tracking options, and select Emulate VIVE Wrist Tracker as VIVE Tracker.
Note:
- VIVE Business Streaming version must be 1.08 or later.
- Clear the Hand tracking option if you want to use the tracker role HELD IN HAND in SteamVR.
-
Make sure the two VIVE Wrist Trackers are paired with the headset. Check that the VIVE Wrist Trackers are being tracked in the SteamVR window.

-
In Unreal Engine, click Edit > Project Settings > Input.
- Click + to the right of Action Mapping, and then add two actions (for example, TrackerButton1 and TrackerButton2).
- In the Motion Controller component for the VIVE Tracker, choose the Motion Source that you previously assigned to VIVE Tracker.
- Tracker_Foot_Left
- Tracker_Foot_Right
- Open the SteamVR settings, and click Controllers > SHOW OLD BINDINGS UI.
Note: Make sure the Advanced Settings are showing.
-
Choose your application, and then under Current Controller, choose the tracker role that you defined before for the VIVE Tracker.

-
Bind the following:
- TrackerButton1 to /input/power.
- TrackerButton2 to Menu.
Now, tracker poses are reported to SteamVR as vive_ tracker_left_foot and vive_ tracker_right_foot. Button events are recognized by SteamVR as /input/power and Menu, and then mapped to Unreal Engine as actions TrackerSystemBtn and TrackerMenuBtn.