Composition Layer
In XR, the render pipeline will sample the content (what the player sees in the app) twice. By doing so, the graphics looks worse and makes it harder for the player to see some important information, such as texts. By using Composition Layer, we can bypass one of the sampling processes, which will result in a much better and clearer image.
- Understanding Overlays and Underlays
- Supported Platforms and Devices
- Specification
- Environment Settings
- Golden Sample
- See Also
Understanding Overlays and Underlays
Hello, in this article, I want to talk about the concept of Overlays and Underlays, which is fundamental to the CompositionLayer and Passthrough features. While these terms might sound confusing, I will help you understand them easily.
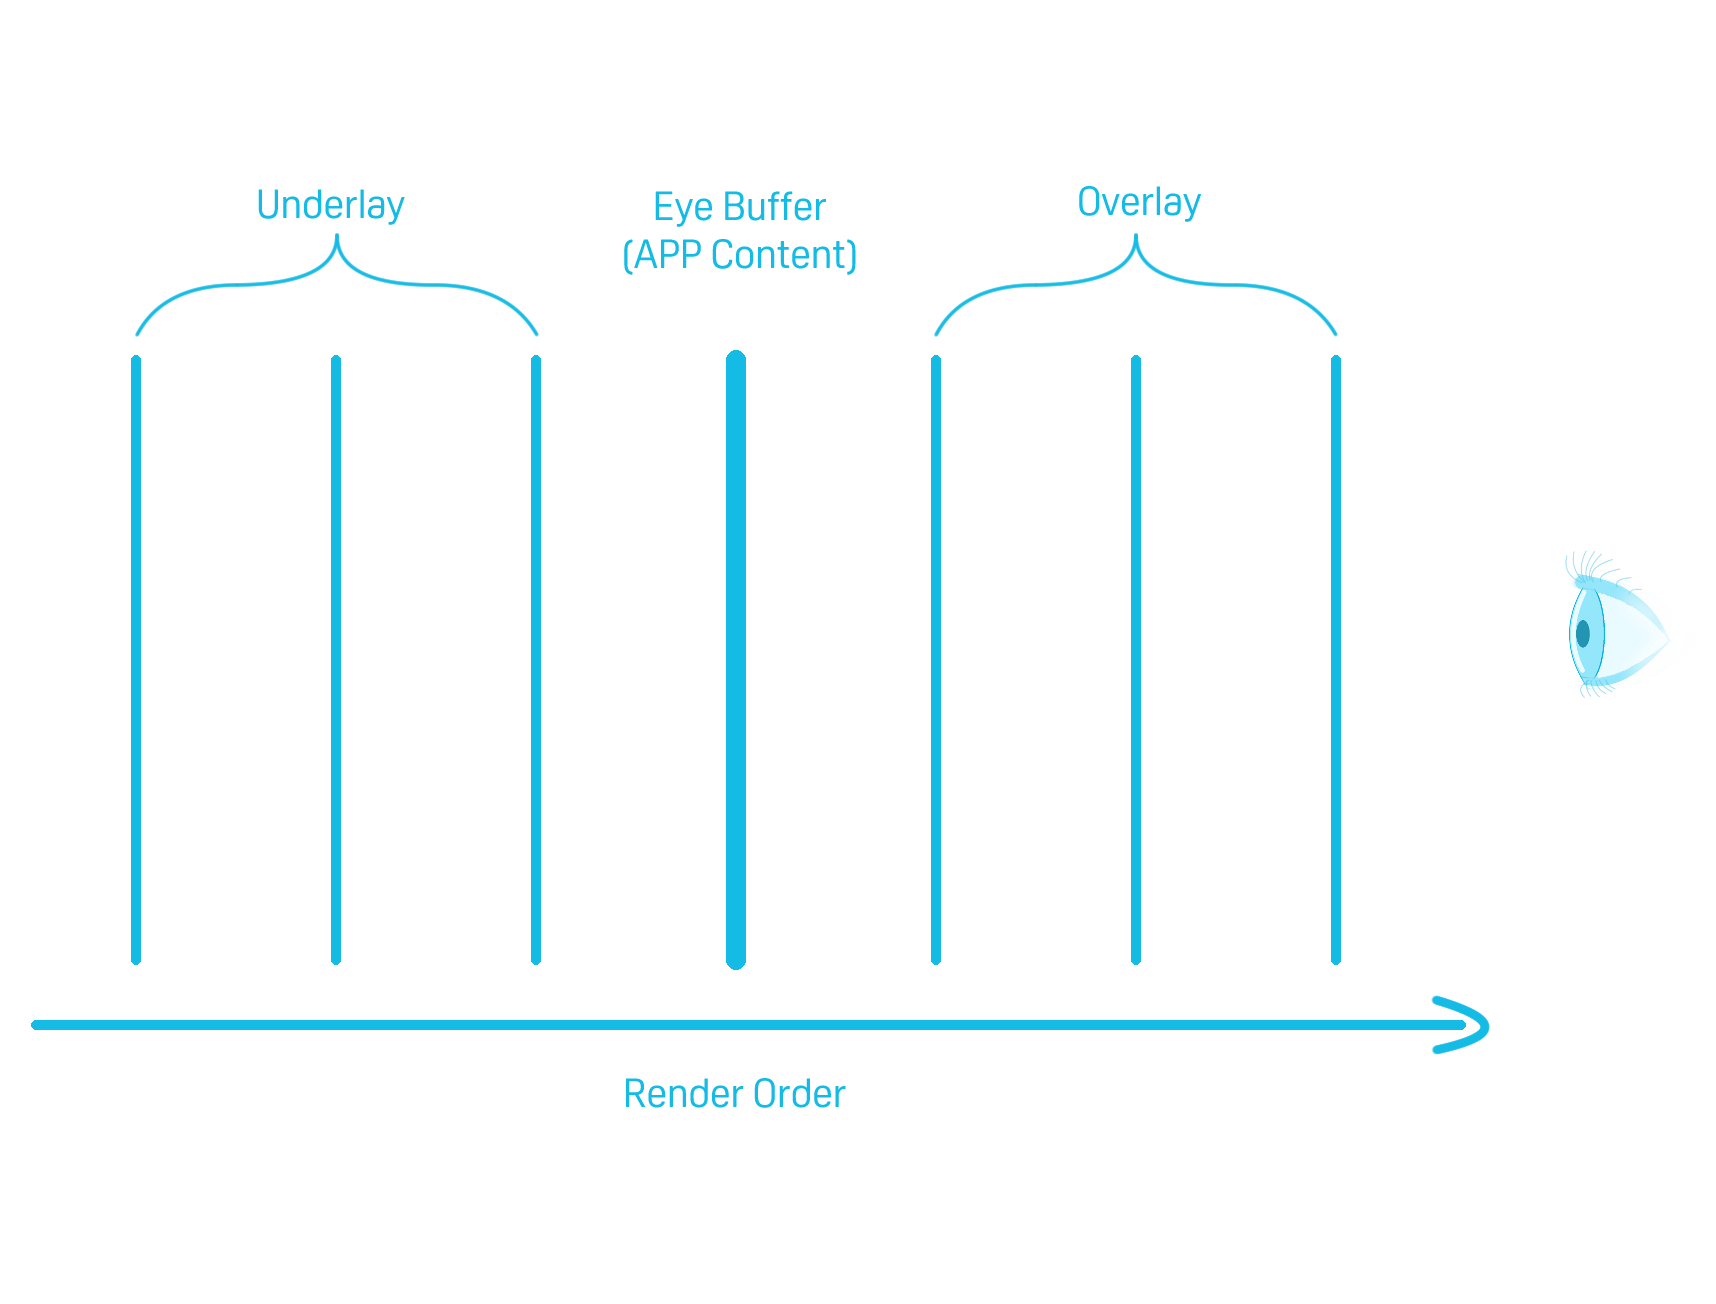
First, think about a scene with neither composition layers nor passthroughs. The scene is 3D, with GameObjects, UIs, Skybox, etc. in it and these objects occlude one another. However, no matter how complex the 3D scene is, it will always be rendered as a 2D flat image. Now this 2D image is what we call the content layer.
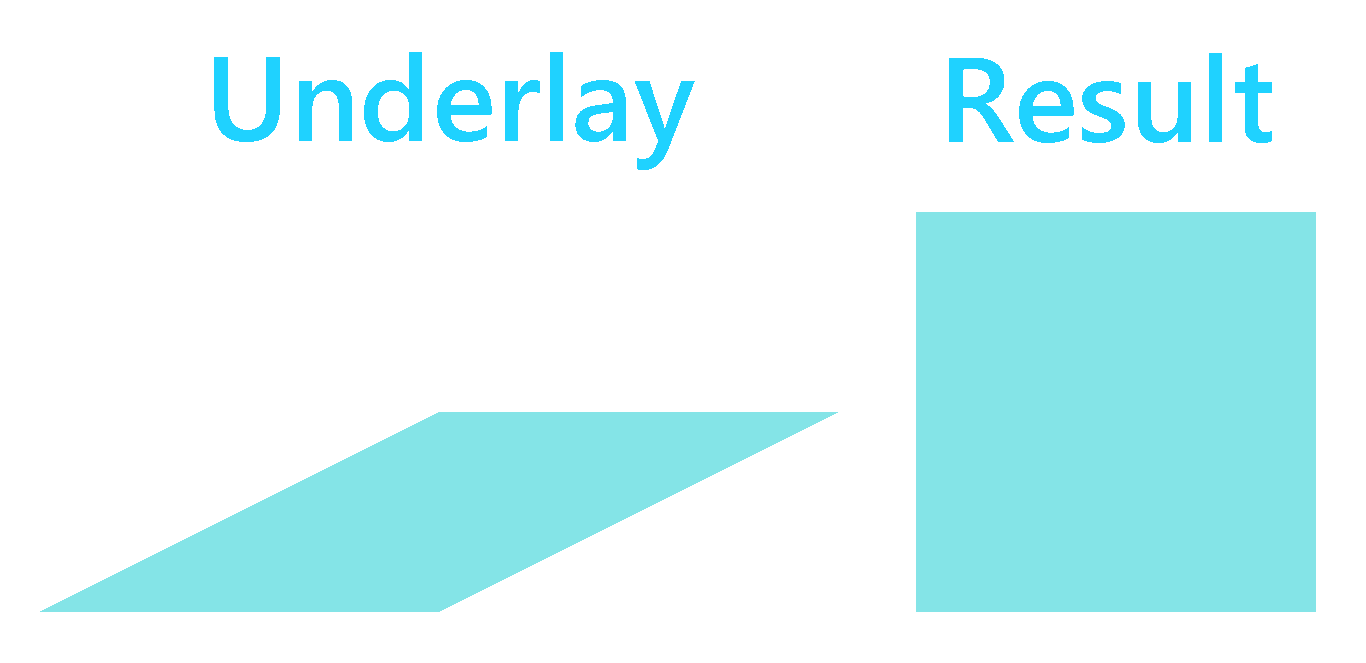
So think the content layer as a sheet of paper. What will you see when you put another sheet of paper on top of the content layer paper? It will be blocked by the sheet on top, right? The sheet on top is what we call an overlay layer. Now that we have two sheets of paper, the one on top and the content one, lets put another sheet of paper, the underlay, under the two we already have. What will we see? We can still only see the one on top. Now you might wonder what is the point of using overlays and underlays if overlays will always block the content and the underlays will always be blocked by the content. But who says that the sheets of paper are always a whole piece? What if we cut the sheet on top (overlay) into a rectangle? Now we are able to see the content with a small rectangle on top of it. And if we cut a hole on the middle (content) one? We now can see the bottom (underlay) one through the hole!
In conclusion, whenever you are confused by Overlays and Underlays, just think of them as a stack of papers. And of course there can be more than three sheets of paper, but the idea remains the same.
Supported Platforms and Devices
| Platform | Headset | Supported | Plugin Version | |
| PC | PC Streaming | Focus 3/XR Elite/Focus Vision | X | |
| Pure PC | Vive Cosmos | X | ||
| Vive Pro series | X | |||
| AIO | Focus 3 | V | 2.3.0 and above | |
| XR Elite | V | 2.3.0 and above | ||
| Focus Vision | V | 2.3.0 and above | ||
Specification
This chapter dives into creating immersive experiences with the Composition Layer feature. We'll explore its use within the XR_KHR_composition_layer_cylinder and XR_KHR_composition_layer_color_scale_bias extensions.
Before we go any further, notice that there are two kinds of Composition Layer component provided by Vive OpenXR Plugin, Composition Layer and Composition Layer UI Canvas, see golden sample for more details.
Environment Settings
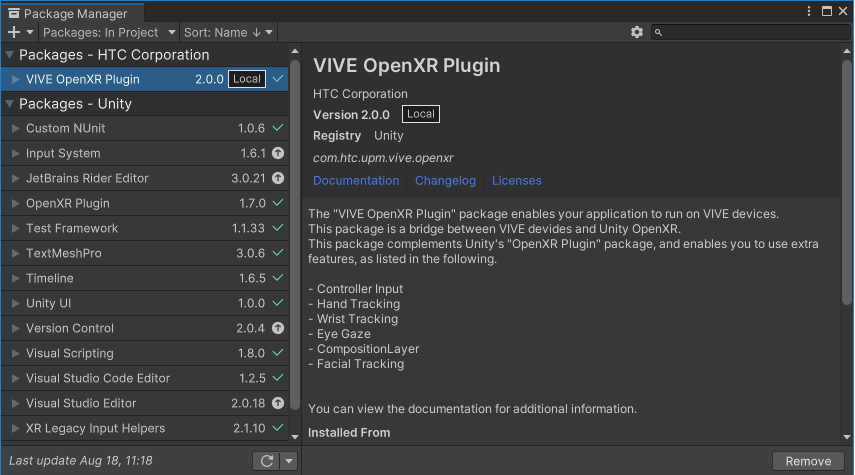
Step 1. Upgrade your VIVE OpenXR Plugin to 2.0.0 or higher
Go to Window -> Package Manager , and upgrade the packages
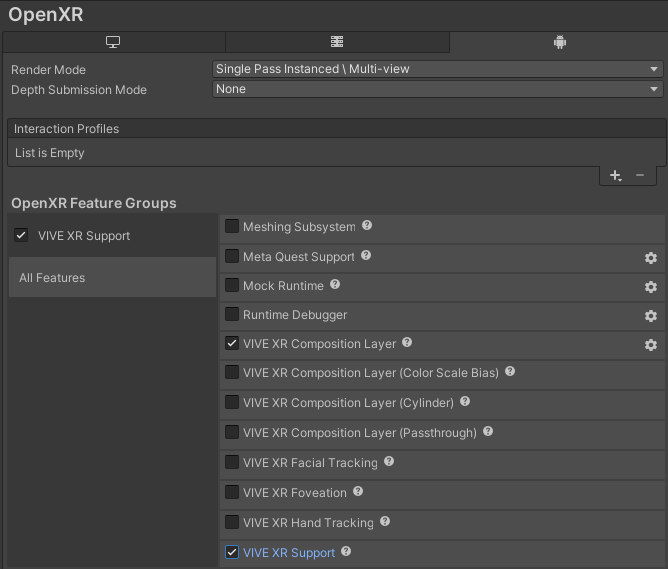
Step 2. Enable the Composition Layer feature
Next, Go to Edit -> ProjectSettings -> XR Plug-In Management -> OpenXR , and enable VIVE XR Composition Layer
Note: If you want to use specific features such as Color Scale Bias or Cylinder, you should enable them as well.
Golden Sample
First, let’s take a look at Composition Layer.
Using the Composition Layer component
The Composition Layer component is basically a mesh, which is drawn not by Unity, but by the headset’s runtime, leading to a better and clearer image.
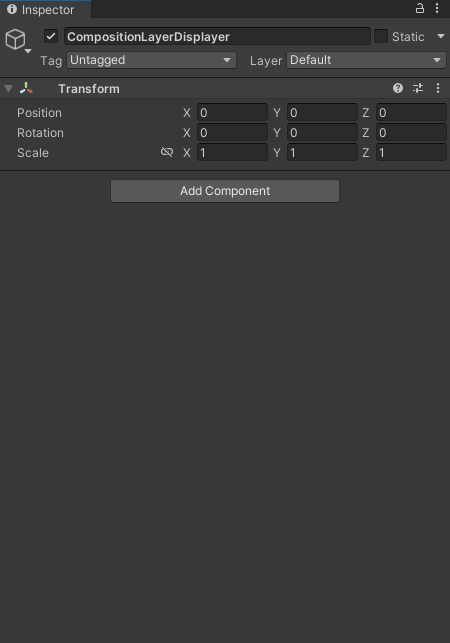
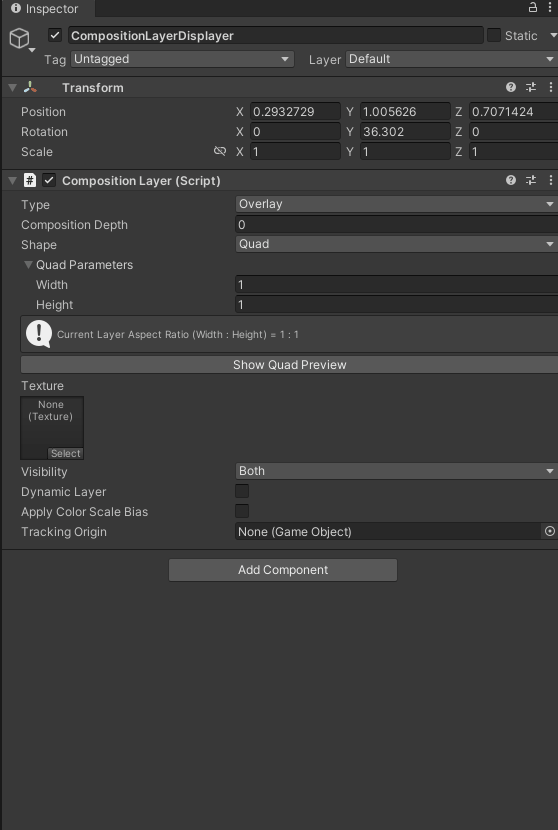
Step 1 . Create an empty GameObject and name it
Create a GameObject and name it "CompositionLayerDisplayer".
Step 2 . Add the Composition Layer component
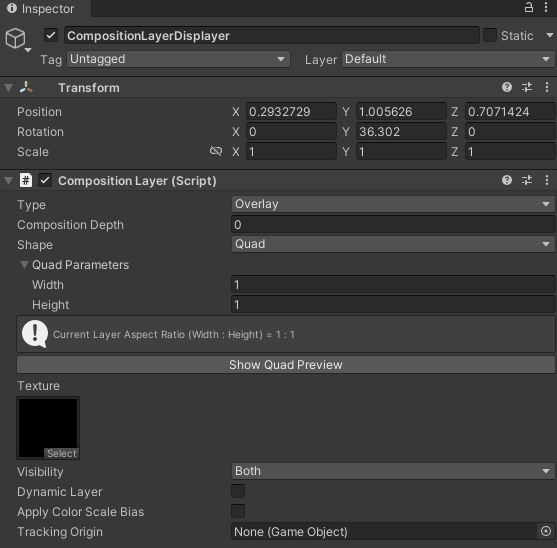
Here is an overview of the parameters of the Composition Layer component :
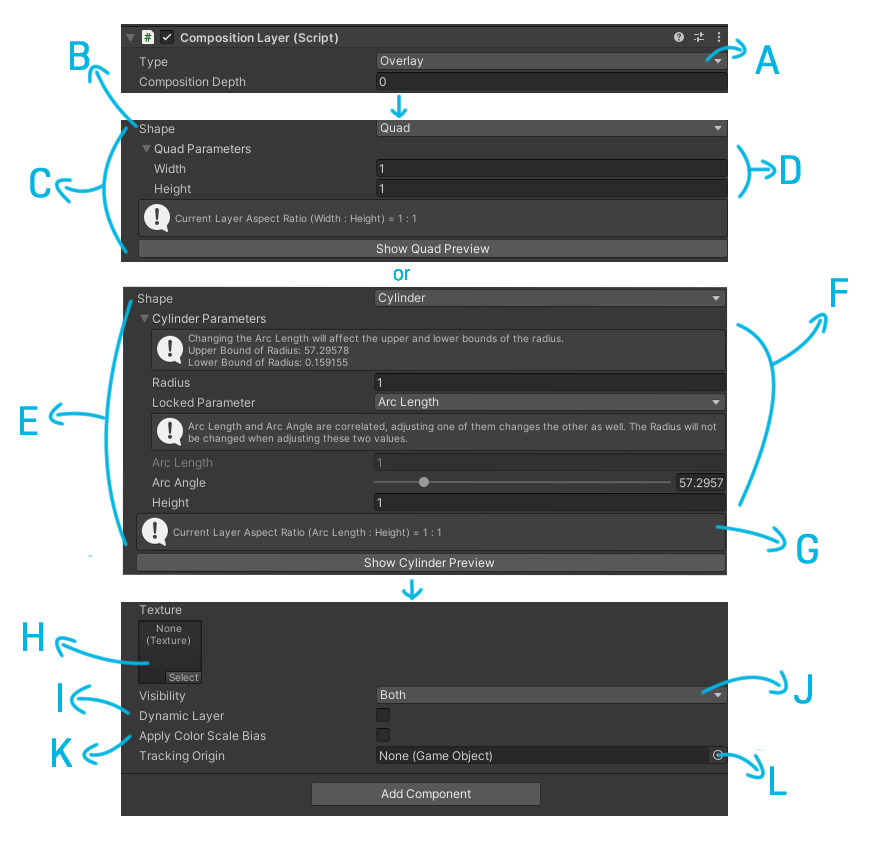
- A (Type):
Whether the Composition Layer should be on top of the app content or not. If Overlay is selected, the Composition Layer will block all content in the app. Otherwise, if Underlay is closed, the composition Layer will blend with the content, blocking or be blocked like usual GameObjects. - B(Shape):
Should the Composition Layer be flat or cylindrical ? - C (For Quad) :
If Quad is chosen. - D (Width & Height):
The Width & Height of the Quad should always have the same ratio with the Texture. Otherwise, the outcome image will be stretched. - E (For Cylinder):
If Cylinder is chosen. - F (Cylinder Parameters):
How circular do you want the Composition Layer to be? - G (Aspect Ratio):
The ratio of Cylinder Composition Layer should also be consistent with the original texture. - H (Texture):
The texture of the layer. - I (Dynamic Layer):
Will the texture change dynamically when the app is running? e.g. a video . Or is the texture will not change? e.g. a picture or a line of text. - J (Visibility):
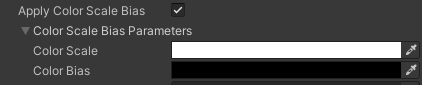
Should the Composition Layer image be seen by both eyes or only one of them? - K (Apply Color Scale Bias):
Color scale and bias are applied to a layer color during composition, after its conversion to premultiplied alpha representation. - L (Tracking Origin):
The tracking origin of the scene, usually the root of the Rig.
Note:
Remember the world Scale of the Composition Layer GameObject should always be Vector3(1, 1, 1).
If you need to scale the Composition Layer, use the Parameters under Shape (e.g. Width & Height)
Overlay:
Underlay:

The Solid Effect option means Underlay apply color scale & bias in runtime level, the effect result will be the same with Overlay if the option not checked.
For an in-depth look at the Color Scale Bias: please check the OpenXR definition .
Next, we are going to see the other kind of Composition Layer provided by VIVE OpenXR Plugin, the Composition Layer UI Canvas .
Using the Composition Layer UI Canvas component
The Composition Layer UI Canvas component converts a UI canvas into a Composition Layer, which is also not drawn by Unity, but by the headset’s runtime.
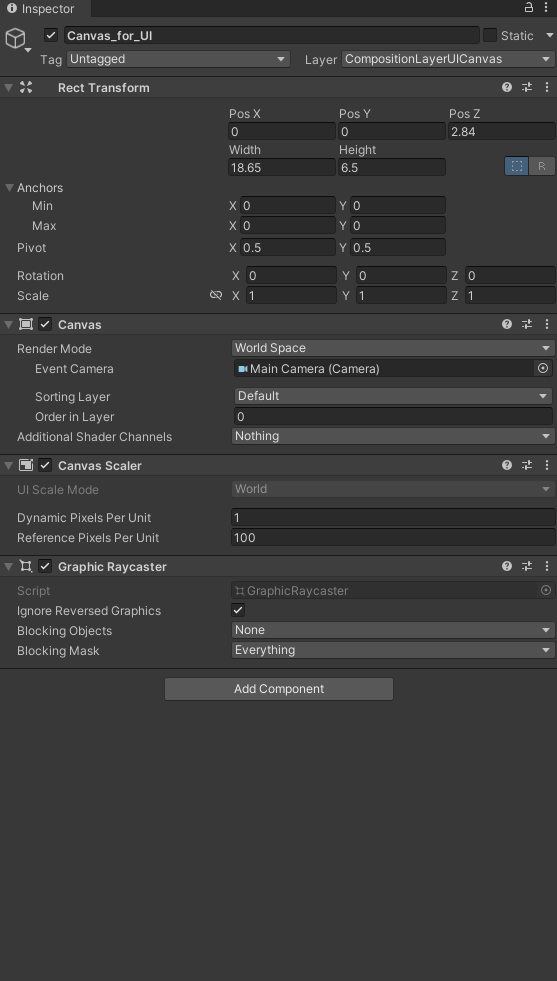
Step 1. Select or Create an UI Canvas
Select or Create a UI canvas which you would like to make a Composition Layer.
Step 2. Add the Composition Layer UI Canvas component
Following are the usages of the parameters of the Composition Layer UI Canvas.
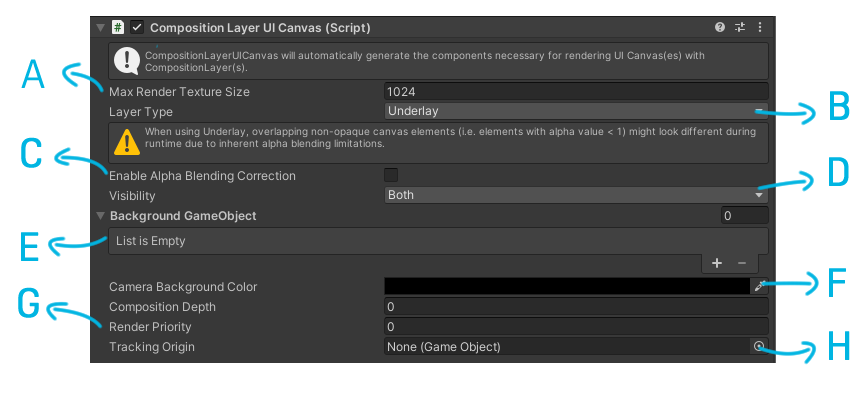
- A (Max Render Texture Size) :
The resolution of the Composition Layer UI Canvas. - B (Layer Type) :
Should the layer be an Overlay or Underlay? - C ( Enable Alpha Blending Correction ):
Enable this id the transparent UI is dracker than expected. - D (Visibility ):
Should the layer being seen by both eyes or only one of them? - E (Background GameObject ):
Are there any GameObject you wish the layer to deem as background? - F (Camera Background Color) :
The background color of the layer. - G (Render Priority):
Layers with a higher render priority and are within the maximum layer count will be rendered as Multi-Layers, while the others will be rendered in Unity. - H (Tracking Origin) :
The tracking origin of the scene, usually the root of the Rig.
At this point, you should have a basic understanding on how to add basic Composition Layers to your apps.
However, since there are so many use cases where you can make use of Composition Layers, I will discuss some of the more popular ones separately.
You can check the list at the end of this session and pick the topics that you are interested in.
Making High Quality Videos in XR
Hello again, in other sessions, we talked about how to make texts and images clearer by using Composition Layer, but do you know it can also make videos look better ? Imagine how cool it is to see a movie with big and clear screen in XR!
In this session, I’d like to teach you how to do it.
Before we start, if you are not familiar with the Composition Layer feature, please check Composition Layer.
Remember to come back after you finished reading that article.
Okay, now that you have a brief understanding of the Composition Layer, let’s continue.
Step 1. Create an empty GameObject and Add a Composition Layer component to it
Create a Gameobject with a Composition Layer component.
Step 2 . Add Video Player to the same GameObject
Add Video Player to the same GameObject.
Step 3 . Create a Render Texture
Step 4 . Assign the Render Texture to the Composition Layer
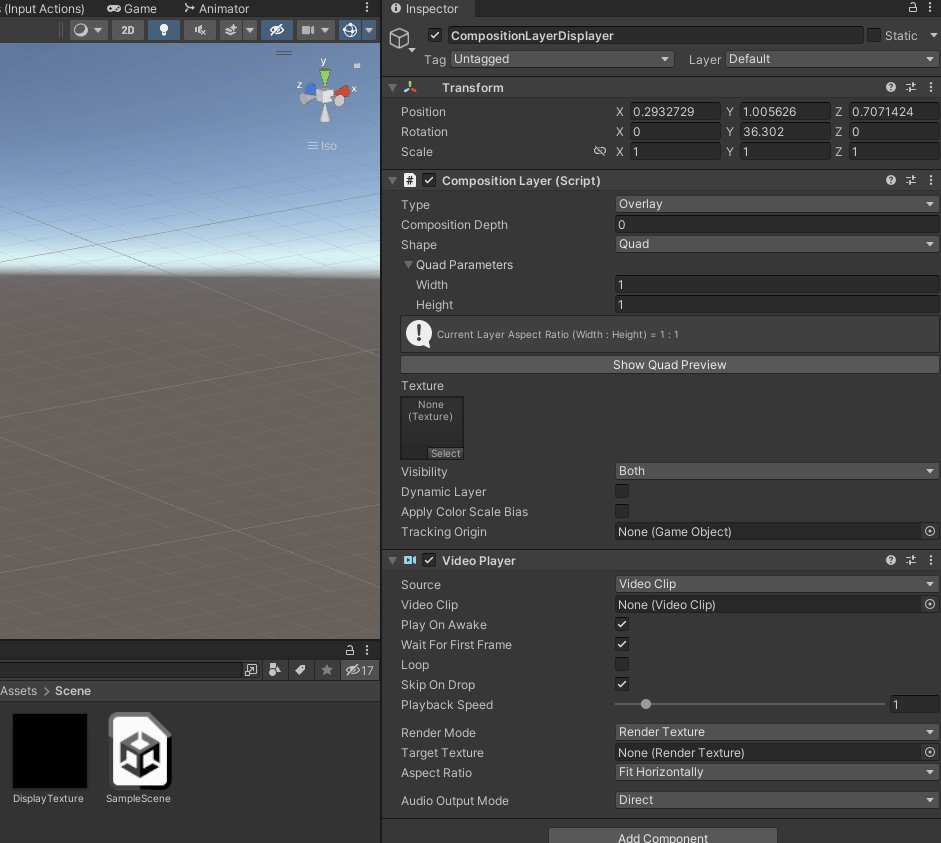
Step 5 . Assign the Render Texture to the Video Player and give it the Video Clip
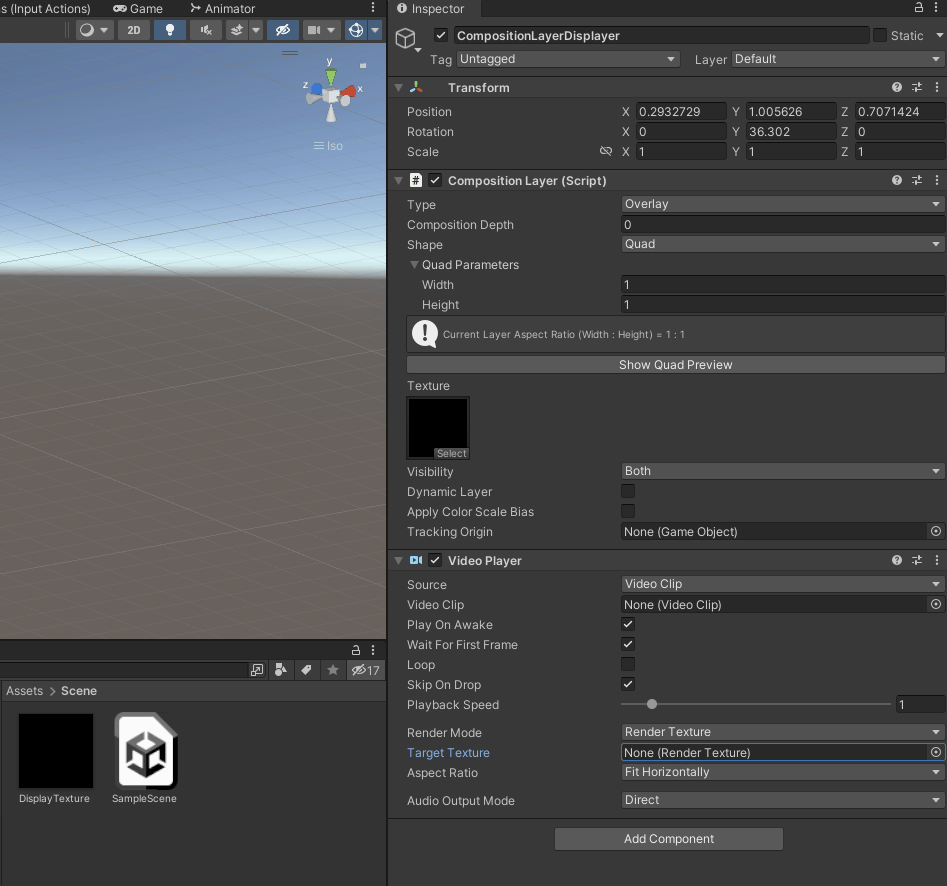
Step 6 . Enable Dynamic Layer under the Composition Layer
Final Step.
Adjust the position, rotation, size and all other parameters of the Composition Layer according to your needs.
Remember the Scale of the Composition Layer GameObject should always be Vector3(1, 1, 1).
If you need to scale the Composition Layer, use the Parameters under Shape (e.g. Width & Height)
Now, go build and run the app and enjoy your high-quality video in XR!
Adding Stereoscopic VR to the Composition Layer
By presenting the same scene from two slightly different viewpoints, one for each eye, the brain perceives depth, creating a stereoscopic 3D effect in VR.
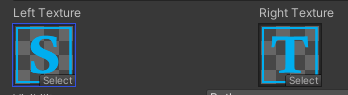
Using Two Textures
Assign each eye's image to its respective texture:
- Set the left-eye image to Left Texture.
- Set the right-eye image to Right Texture.
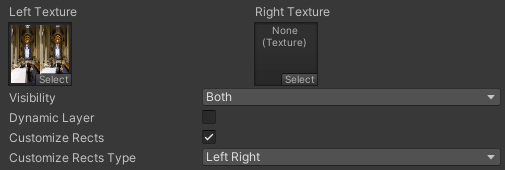
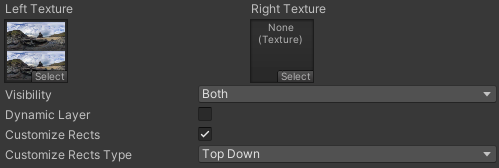
Using a Single Texture with Custom Rects
For a single texture containing left/right or top/bottom images, follow these steps:
- Left/Right Image:
- Assign the combined left/right image to Left Texture.
- Set Customize Rects Type to Left/Right.
- Top/Down Image:
- Assign the combined top/down image to Left Texture.
- Set Customize Rects Type to Top/Down