Installing VIVE OpenXR PC VR Plugin-NPM
-
Download
VIVE OpenXR PC unitypackage
-
Import the unitypackage file in the Unity editor.
How to import : Unity tutorial
-
Select the menu on the Unity UI "VIVE/OpenXR PC Installer", press "Install or Update latest version".

-
For "Install specific version",
Step 1 : Copy the release version from Here
Step 2 : Paste the versionto install the specific version. (For example: "1.0.12")
If you can't find the version we provide on GitHub, please refer the following tutorial to download:
Installing VIVE OpenXR PC VR Plugin in Unity
To install VIVE OpenXR Plugins packages, please add VIVE registry to your project, then install the packages in the package manager.
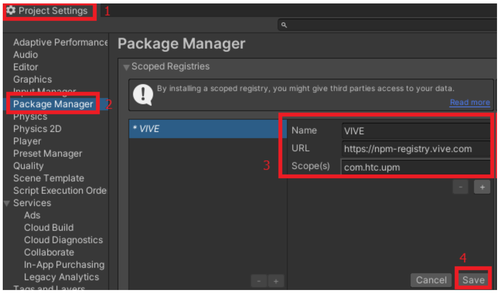
Step 1. Adding VIVE Registry To Your Project
- From menu Edit > Project Settings
- Select Package Manager
- Input VIVE Registry
- Apply the change
|
Name |
VIVE |
|
URL |
https://npm-registry.vive.com |
|
Scope |
com.htc.upm |
|
Note: All space in “URL” and “Scope(s)” must be trimmed |
|

Step 2. Installing Plugins Through Unity Package Manager
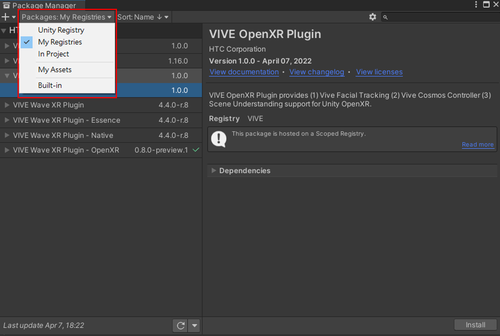
1. Open package manager
2. In Unity 2020.1 and later, you should switch to
My Registries
to see the packages from sources other than Unity registry.

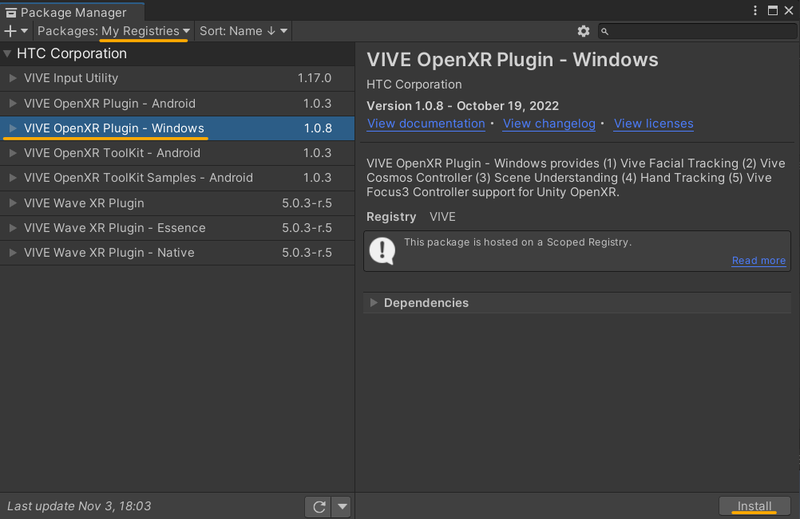
3. Install
VIVE OpenXR Plugins – Windows in the list
.

(
Note:
The version of the plugin available on your package manager may be different from the one in the screenshot, select the latest version or any version that suits your needs.)
Note: After installing the plugin, you have to change the Project settings of Unity.