Composition Layer
⚠ NOTICE |
|
This legacy plugin is no longer being updated and maintained, please develop mobile content with OpenXR 2-in-1 Unity / Unreal package . |
In XR, the render pipeline will sample the content (what the player sees in the app) twice. By doing so, the graphics looks worse and makes it harder for the player to see some important information, such as texts. By using Composition Layer, we can bypass one of the sampling processes, which will result in a much better and clearer image.
The Use
cases of Composition Layer:
Understanding and Using Composition Layer
In this session, we are going to learn how to use the Composition Layer feature provided by VIVE OpenXR Plugin in Unity .
Install the feature
Step 1. Upgrade your VIVE Wave OpenXR Plugin & Toolkit for Android to 1.0.2 or higher
Go to Window -> Package Manager , and upgrade the packages


Step 2. Enable the Composition Layer feature
Next, Go to Edit -> ProjectSettings -> XR Plug-In Management -> OpenXR , and enable VIVE Focus 3 Composition Layer
Note: If you want to use specific features such as Color Scale Bias or Cylinder, you should enable them as well .
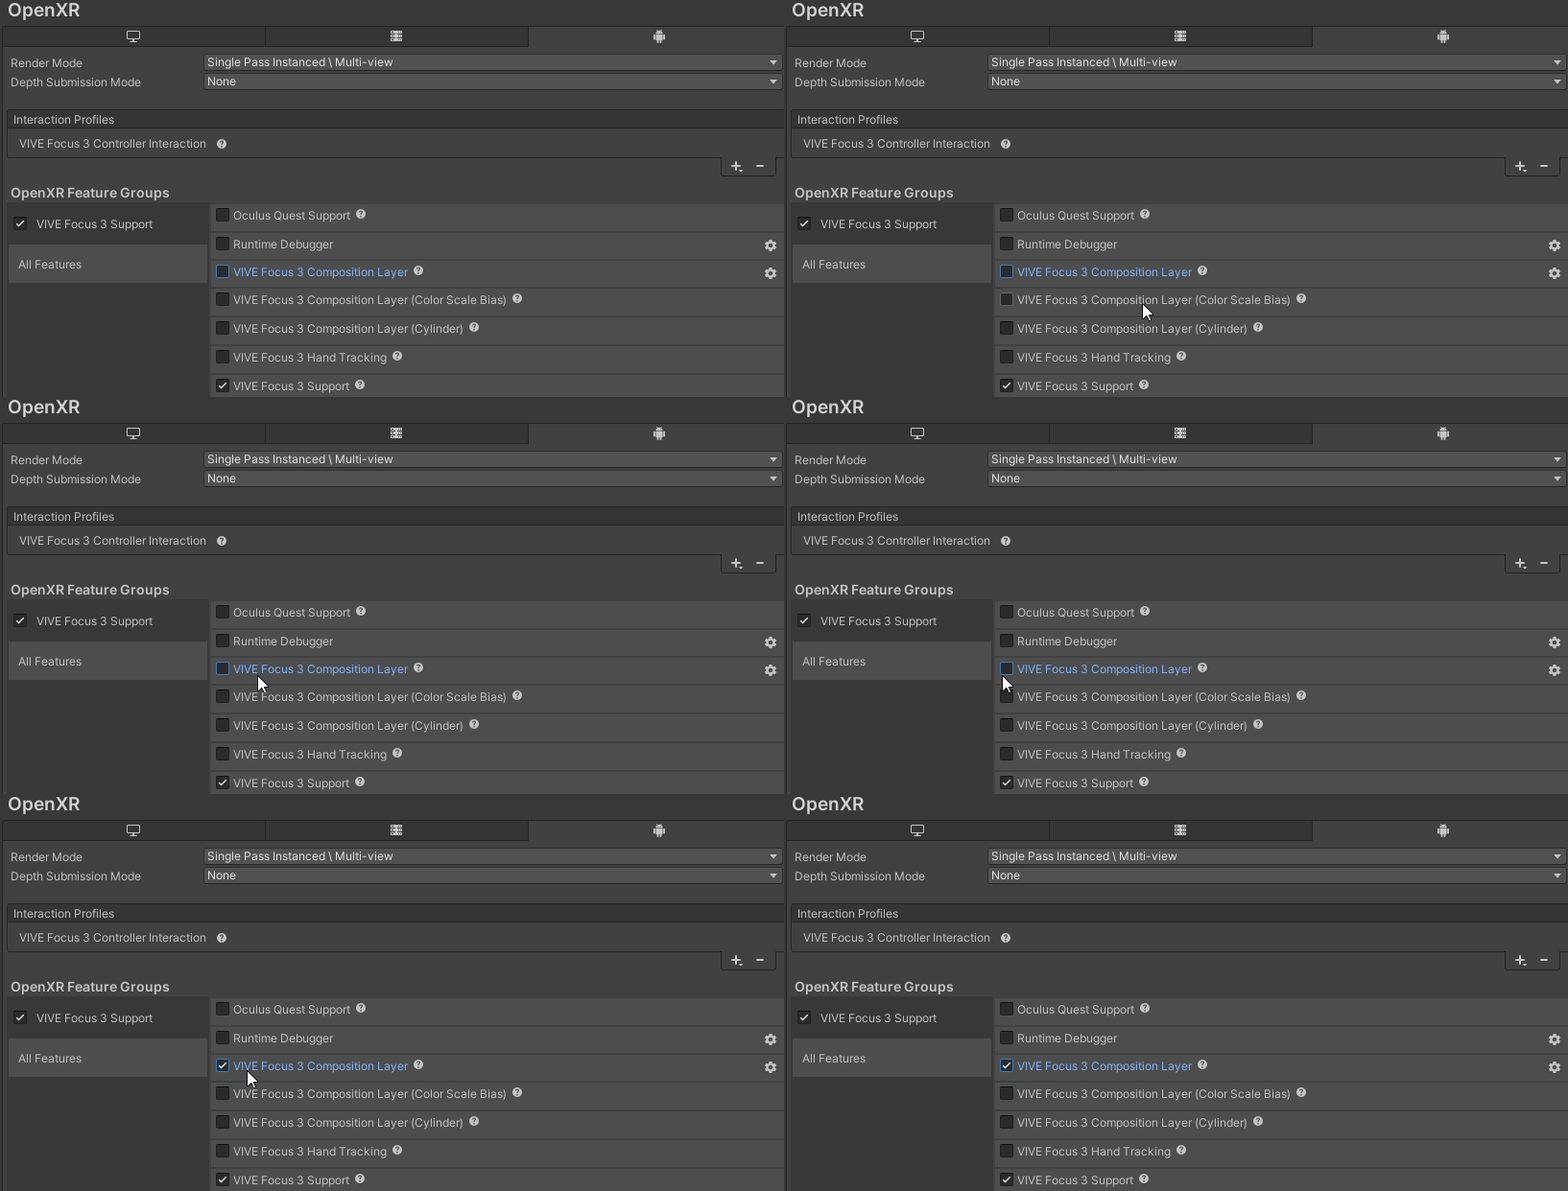
Before we go any further, notice that there are two kinds of Composition Layer component provided by Vive OpenXR Plugin , Composition Layer and Composition Layer UI Canvas.
First, let’s take a look at Composition Layer .
Using the Composition Layer component
The Composition Layer component is basically a mesh, which is drawn not by Unity, but by the headset’s runtime, leading to a better and clearer image.
Step 1 . Create an empty GameObject and name it
Create a GameObject and name it “ CompositionLayerDisplayer ”.
Step 2 . Add the Composition Layer component
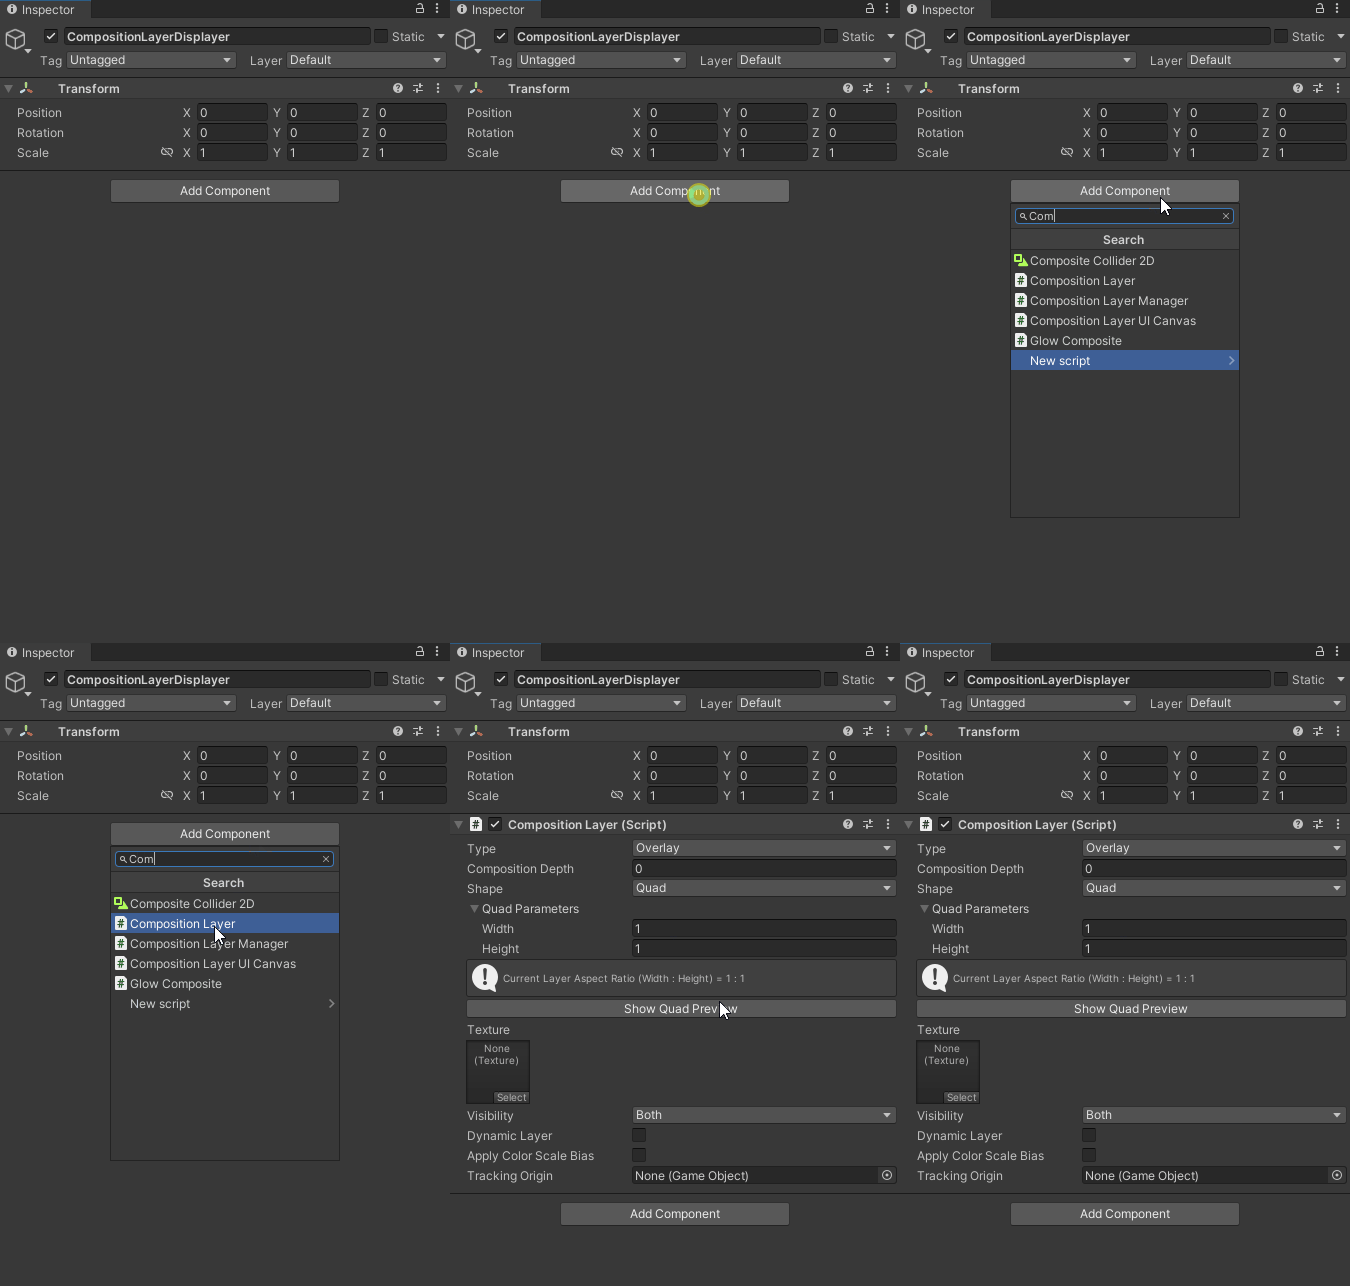
Here is an overview of the parameters of the Composition Layer component :
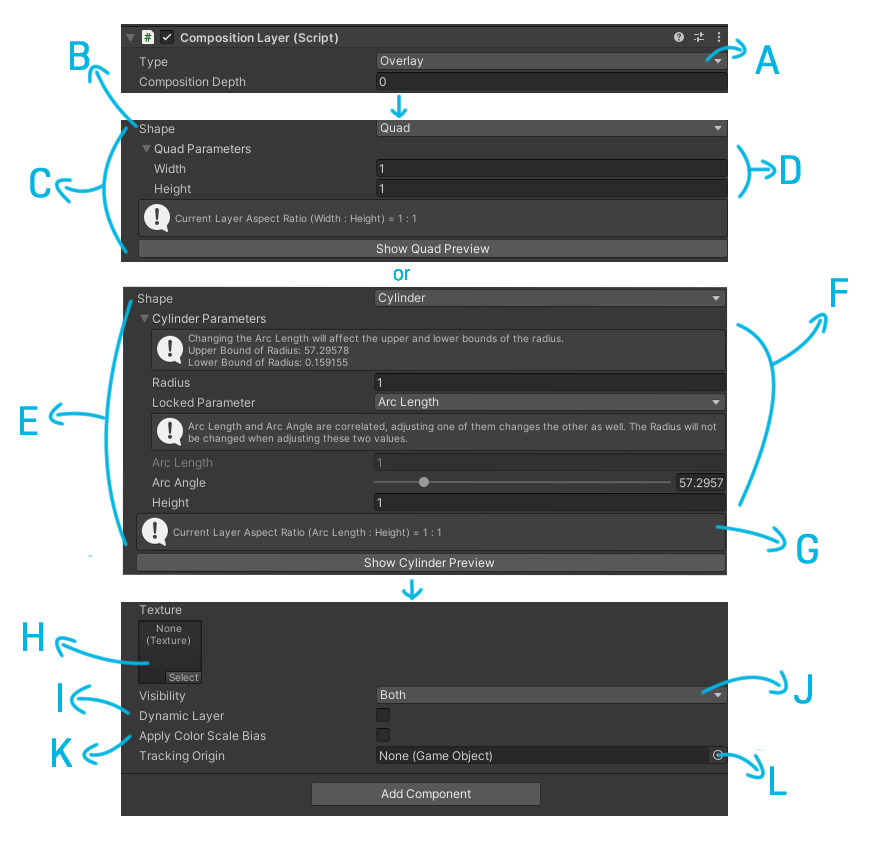
-
A (Type):
Whether the Composition Layer should be on top of the app content or not. If Overlay is selected, the Composition Layer will block all content in the app. Otherwise, if Underlay is chosed, the composition Layer will blend with the content, blocking or be blocked like usual GameObjects . -
B(Shape):
Should the Composition Layer be flat or cylindrial ? -
C (For Quad)
:
If Quad is chosen . -
D (Width & Height):
The Width & Height of the Quad should always have the same ratio with the Texture. Otherwise, the outcome image will be stretched.
-
E (For Cylinder):
If Cylinder is chosen . -
F (Cylinder Parameters):
How circular do you want the Composition Layer to be? -
G (Aspect Ratio):
The ratio of Cylinder Composition Layer should also be consistent with the original texture .
-
H (Texture):
The texture of the layer . -
I (Dynamic Layer):
Will the texture change dynamically when the app is running? e.g. a video . Or is the texture will not change? e.g. a picture or a line of text -
J (Visibility):
Should the Composition Layer image be seen by both eyes or only one of them? -
K (Apply Color Scale Bias):
Color scale and bias are applied to a layer color during composition, after its conversion to premultiplied alpha representation. -
L (Tracking Origin):
The tracking origin of the scene, usually the root of the Rig .
Note:
Remember the world Scale of the Composition Layer GameObject should always be Vector3(1, 1, 1).
If you need to scale the Composition Layer, use the Parameters under Shape (e.g. Width & Height)

For an in-depth look at the Color Scale Bias: please check the OpenXR definition .
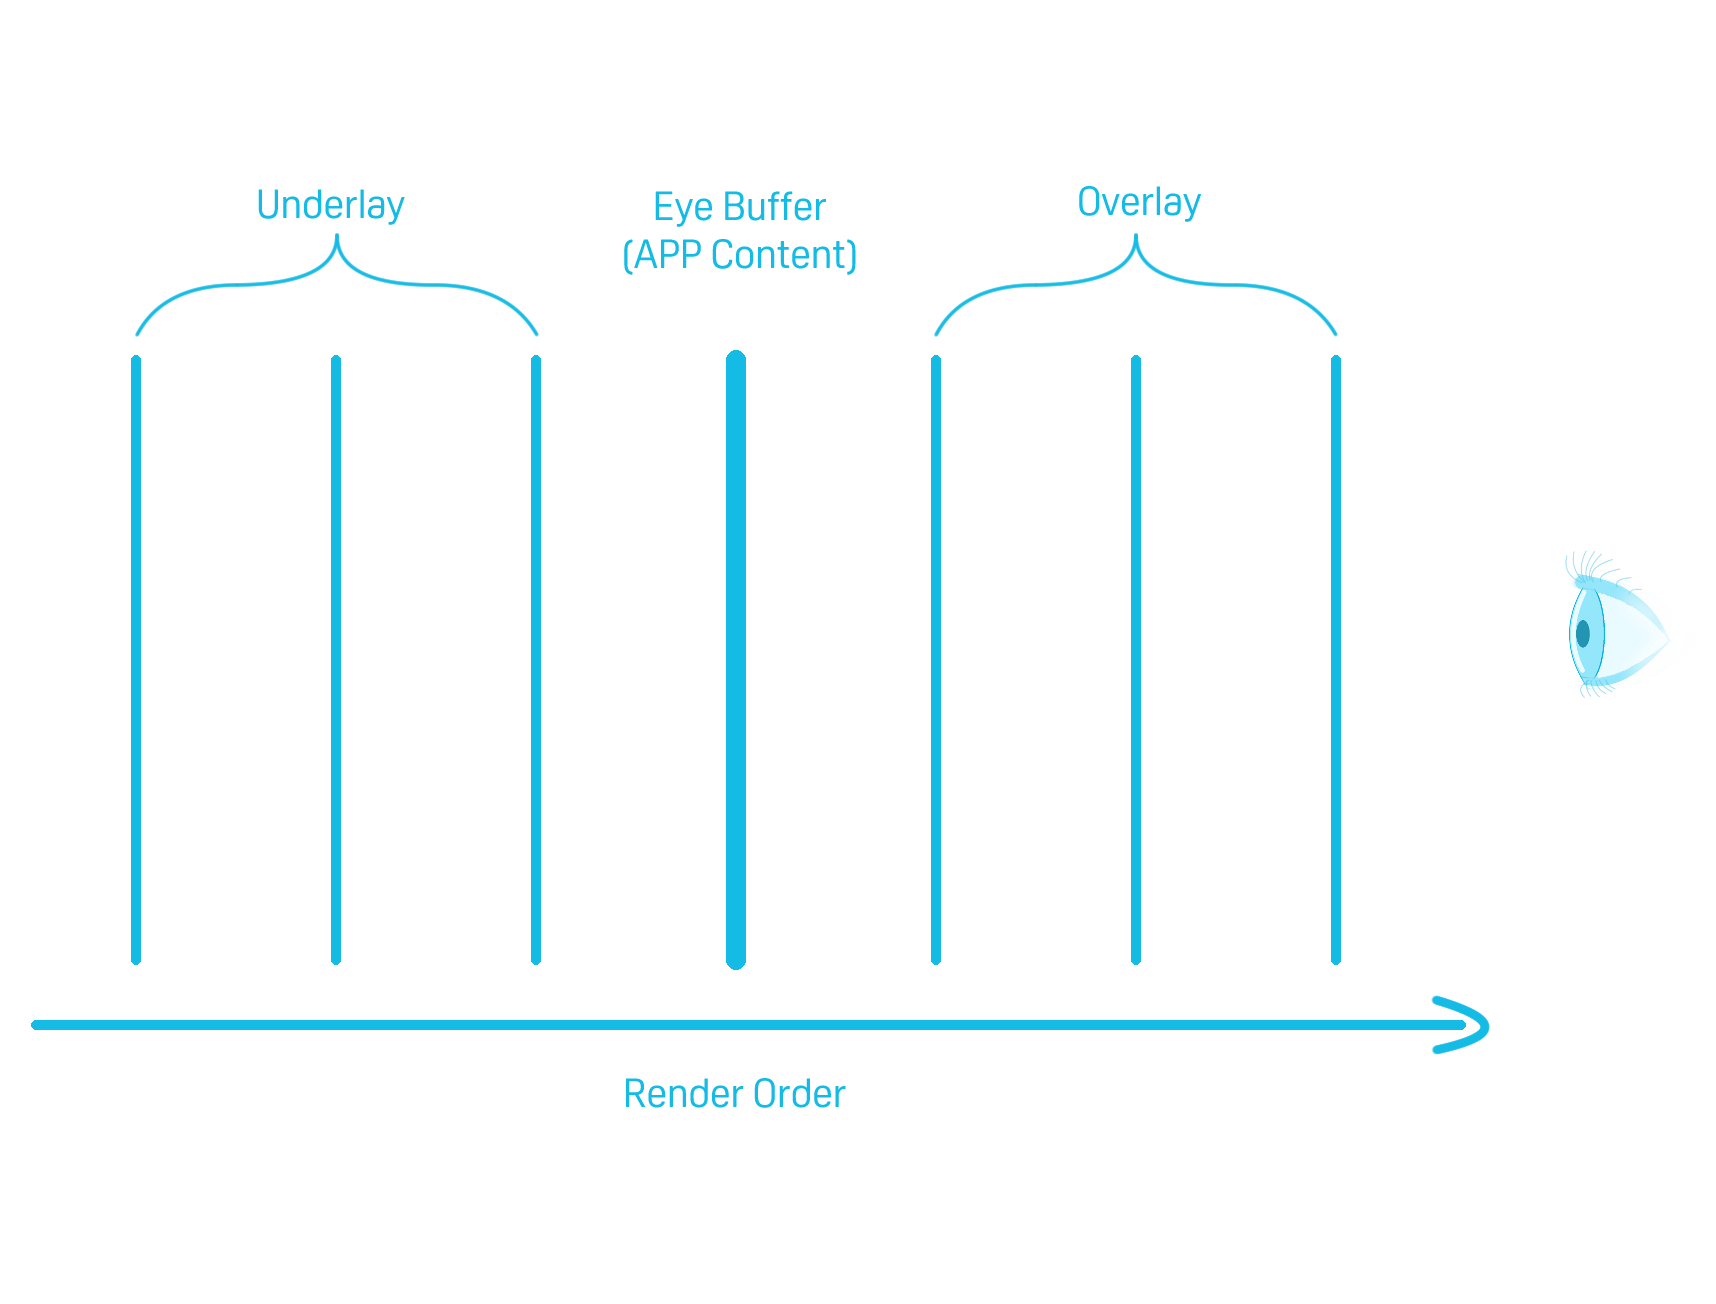
Next, we are going to see the other kind of Composition Layer provided by VIVE OpenXR Plugin, the Composition Layer UI Canvas .
Using the Composition Layer UI Canvas component
The Composition Layer UI Canvas component converts a UI canvas into a Composition Layer, which is also not drawn by Unity, but by the headset’s runtime .
Step 1. Select or Create an UI Canvas
Select or Create a UI canvas which you would like to make a Composition Layer .
Step 2. Add the Composition Layer UI Canvas component
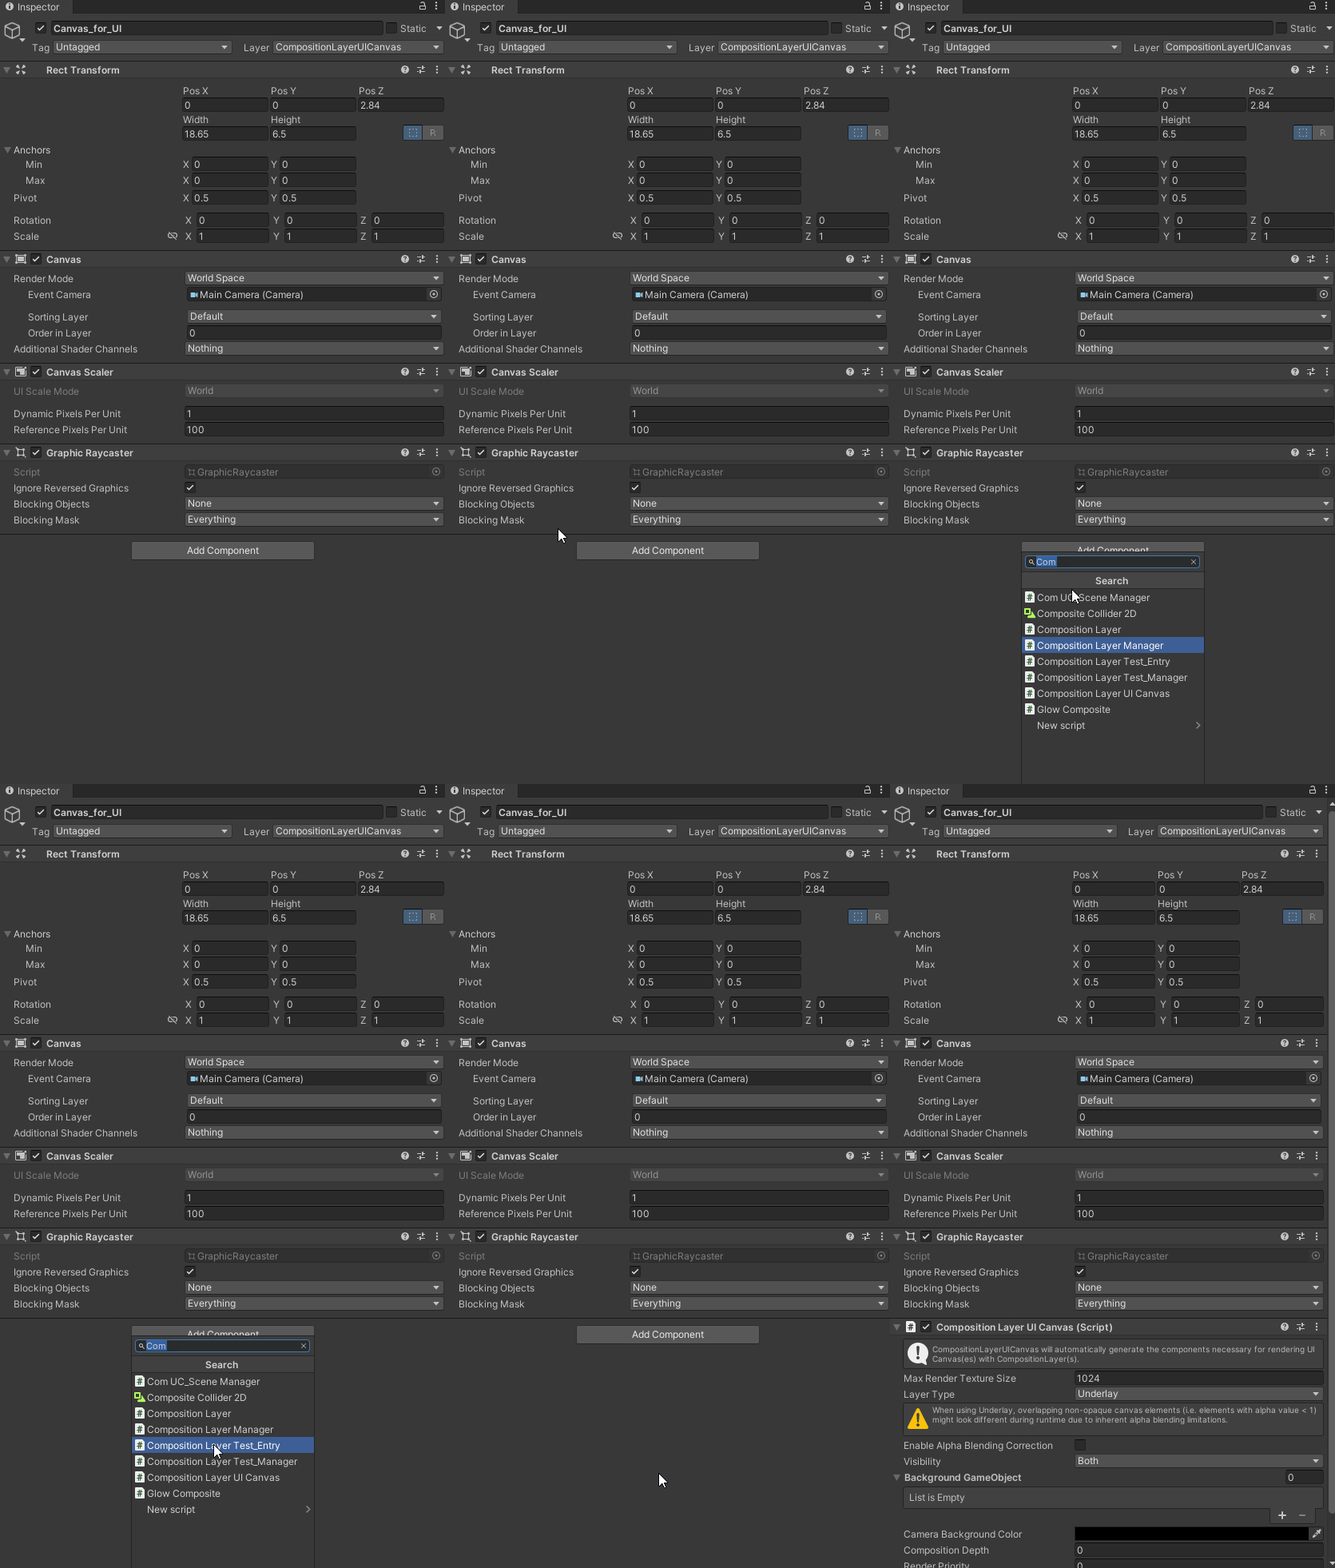
Following are the usages of the parameters of the Composition Layer UI Canvas .
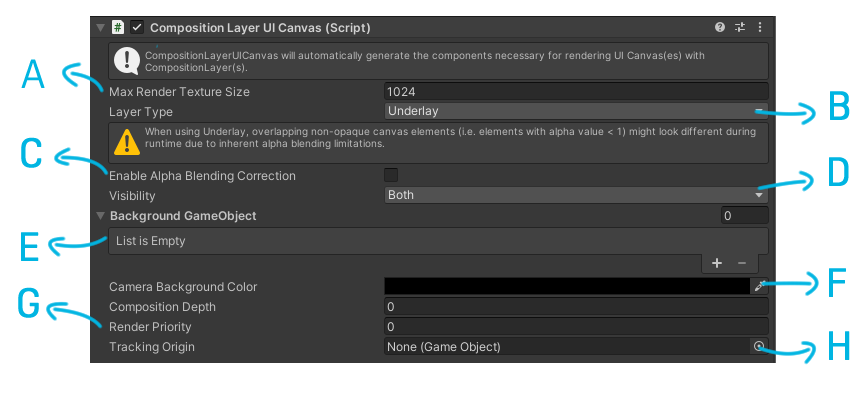
-
A (Max Render Texture Size)
:
The resolution of the Composition Layer UI Canvas -
B (Layer Type)
:
Should the layer be an Overlay or Underlay? -
C ( Enable Alpha Blending Correction
):
Enable this id the transparent UI is dracker then expected.
-
D (Visibility
):
Sould the layer being seen by both eyes or only one of them? -
E (Background GameObject
):
Are there any GameObject you wish the layer to deem as background? -
F (Camera Background Color)
:
The background color of the layer -
G (Render Priority
):
Layers with a higher render priority and are within the maximum layer count will be rendered as Multi-Layers, while the others will be rendered in Unity. -
H (Tracking Origin)
:
The tracking origin of the scene, usually the root of the Rig .

At this point, you should have a basic understanding on how to add basic Composition Layers to your apps.
However, since there are so many use cases where you can make use of Composition Layers, I will discuss some of the more popular ones separately.
You can check the list at the end of this session and pick the topics that you are interested in .