Getting Started With Accessibility: Adding Subtitles
For this post we're going to review the best practice of including captions or subtitles in your XR applications primarily focusing on addressing hearing loss. We'll specifically walk through some considerations based on the XRA guide above in a simple example using the Unity game engine but the guidelines and concepts are applicable to any game engine and toolkit. Here is a Unity package for developers to add to their project by simply dropping the Subtitles prefab onto their camera:
SubtitlesDemo project:
Note: Although we're focusing on a specific use case, please review the guidelines to also include best practices for the vision impaired which includes allowing customization of font size, font color, position of the captions as well as the use of scrim-like overlays. A scrim is a translucent gradient layer that aids in making text more readable against background pictures, colors, objects and other elements that might affect a user’s ability to read it.
Captions reflect what is audible on-screen whereas subtitles are a translation of what is audible in a different language. Note that in some countries they are used interchangeably, so for this discussion we'll use 'subtitle' to also indicate captions.
We'll leverage the most common subtitle text based file format and use open source code as a starting point to parse this file format.
Specifically we'll use the SRT format which typically looks like this:
1
00:00:00,000 --> 00:00:02,500
This is a test
2
00:00:02,500 --> 00:00:04,500
of using <i>italics</i>,
3
00:00:04,500 --> 00:00:06,500
<b>bold</b> and
4
00:00:06,500 --> 00:00:08,500
large <size=40>fonts</size>
5
00:00:09,000 --> 00:00:12,000
<b><i><color=red>and color.</color></i></b>
As you can see this format defines a linear sequence of lines of text each appearing for the time span indicated wih some limited markup capability.
SRT file parsing may already be available with some third party video players such as the Unity plugin AVPro which supports SRT for use with 360 videos. However we'll include parsing in this walkthrough as the default Unity video player doesn't include SRT support and we also want to use it with XR content outside of videos. If your app is not a linear narrative use case which would be most games, you would simply have a separate SRT file that you can play on demand for each section of dialogue or sound even for a single sequence such as the following (using italics here to indicate a non-spoken sound):
1
00:00:00,000 --> 00i:00:02,500
<i>door bell sound</i>
While there are no standard captioning guidelines specifically for XR, television broadcast captioning guidelines may prove helpful to XR developers. As a starting point, developers should consult captioning guidelines, which provide information on the recommended number of characters per line, characters per second, and standards for punctuation, among other things. Some government agencies, such as the FCC in the U.S have published specific recommendations for broadcast captioning
https://www.fcc.gov/consumers/guides/closed-captioning-television
. And the
W3C (WCAG 2.1)
has guidelines and resources for online accessibility and captioning.
One of the benefits of using SRT files is that you can provide localization for any number of languages or dialects based on e.g. a file name prefix. So depending on the locale selected your code would load the corresponding SRT file. There are also tools to assist in creating the SRT files which is beyond the scope here so we'll assume you have these files ready to integrate for captioning.
As a starting point for our Unity project we use the following open source parser:
https://github.com/roguecode/Unity-Simple-SRT
.
Note: The parser with some improvements is included in this Unity package:
SubtitlesPrefab.unitypackage
which you can simply import into your project. The only dependency is TextMeshPro which is highly recommended.
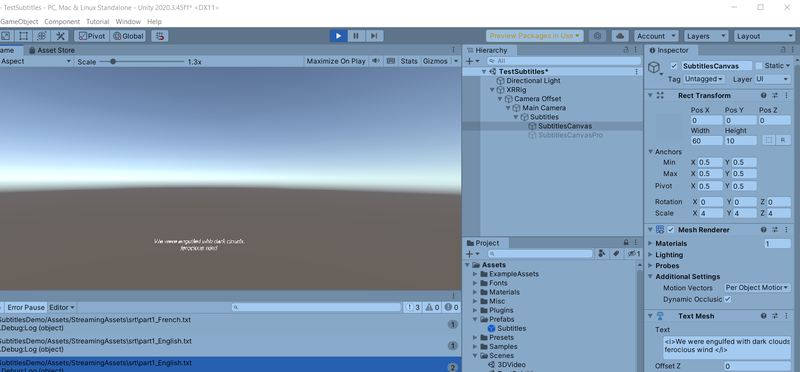
Open a scene in your existing Unity project or the one created in a sample project and add the subtitles prefab as a child object of your camera object in your scene. This will follow your camera view, and you can optionally add the ability to adjust the distance to and size of the subtitles as shown on the right hand side of the demo screenshot above.
Note that the srt sample file is as expected in the StreamingAssets folder in this example, however I recommend that you would consider placing it in local storage outside of the project so that it's accessible to the end user. This would allow the user to modify the text and additionally allow users to add their own translations Again this is assuming using a locale based identifier as part of the file name and preferably have this be discoverable for displaying the optional files.
The more user configurable settings you can add in your project's user settings the better e.g. distance, font size/color, scrim overlay color (easily added via the TextMeshPro component).
For now, at a minimum by adding this prefab to your scene and editing the sample srt text file you have added subtitles and are on your way to earning a checkbox for your project's Viveport submission. In the test script you can switch languages with 'l' key, turn on/off captioning with 'c' and simulate dynamic captions with the 'spacebar'. Again, you should add options for captioning in your settings UI and be able to call up SRT files dynamically from within your application when audio events occur.
Although the recommendation here is to use the attached unity package including the prefab to drop on your camera and related scripts, you can also find the full open source project here:
https://github.com/ViveDeveloperRelations/SubtitlesDemo
Remember to add it to each scene and for non-linear or non-narrative scenes, add a file per audible action as indicated previously, even for non-verbal audio cues. An additional improvement would be to also indicate spatialization as well as identifiable information dynamically e.g. to indicate which speaker is speaking or the relative direction as to where the speaker or sound source is located.