Getting Started with Wave for Unity Developers
What will you learn?
You will learn how to setup a project using the VIVE Wave XR Plugin to create immersive content that runs on devices such as VIVE Devices.
Note: In this tutorial we will use Unity 2021.3.29f1 and VIVE Devices.
What is VIVE Wave Unity Package?
The Vive WAVE XR Plugin is a set of Unity XR Plugins provided by VIVE Wave that are fully integrated with the VIVE Wave native runtime for Unity developers.
Setup Project
Download the Vive Wave XR Plugin here.
Project Settings
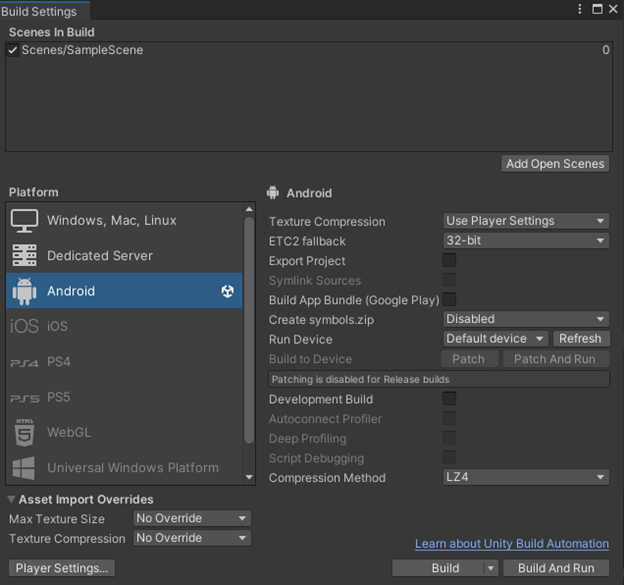
- In File-> Build Settings, the target platform needs to be set to Android. Click on Switch Platform.
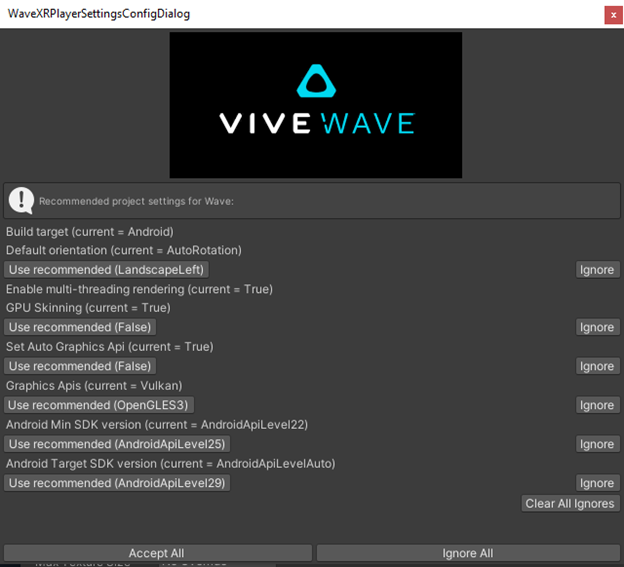
- At the WaveXRPlayerSettingsConfigDialog, click Accept All.
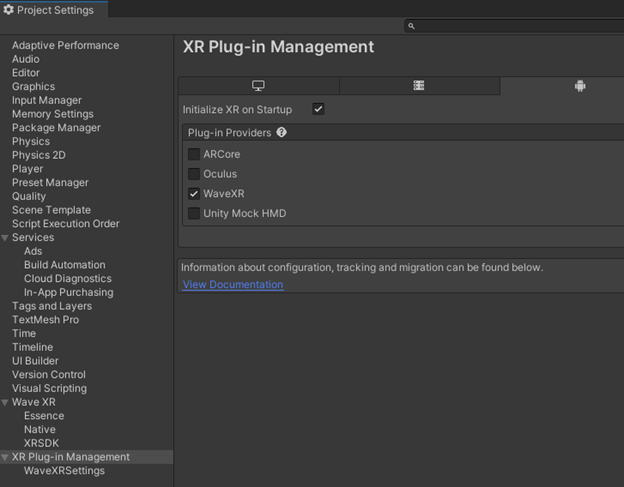
- In Edit-> Project Settings > XR Plug-in Management, place a checkmark by WaveXR under the Android tab.
Setup Headset Tracking
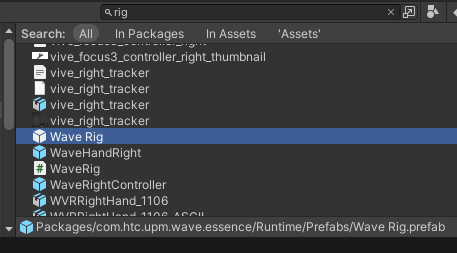
- Search for the Wave Rig prefab in the Project window and add it to the hierarchy.

- Build and deploy the apk to the headset. You should be able to look around the scene in the headset.
Setup Controller Tracking
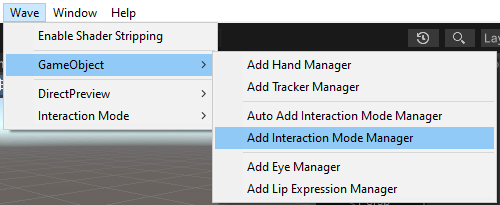
- To see the VIVE controllers in the scene and to have them tracked, go to Wave > GameObject > Add Interaction Mode Manager. For more information about Interaction Mode, you can visit the Wave SDK documentation here.
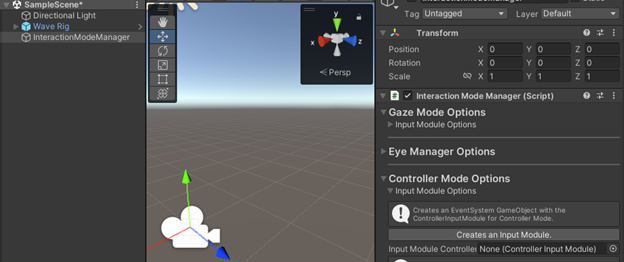
- With the InteractionModeManager gameobject selected, click the dropdown for Controller Mode Options on the Interaction Mode Manager script. Click on the Creates an Input Module button. For more information about the Input Module and you visit the Wave SDK documentation here.
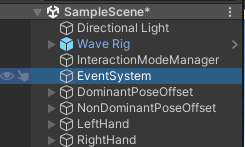
- Creating the input module adds the EventSystem, controller models, and the hand models to the scene. For more information about the Controller Model, you can visit the Wave SDK documentation here.
- Build and deploy the apk to the headset. The controllers should show up now and should be tracked. For more information about Controller Usage, you can visit the Wave SDK documentation here.