Using Direct Preview For Testing On The Headset With Unity
What will you learn?
You will learn to use
DirectPreview
to preview and test VR apps while building the apps in the Unity editor.
Note:
In this tutorial we will use
Unity 2021.3.9f1
and
Vive Focus 3.
What is DirectPreview?
In the development process, repeatedly building APKs in Unity is time-consuming. DirectPreview lets developers skip the build process. Developers can preview in both Unity Editor and their HMD device simultaneously.
Confirm the correct Android adb.exe file is being used by Unity
- From menu Edit-> Preferences-> External Tools. Find the Android SDK Tools path and click Copy Path.
- On the Windows taskbar, right-click the Windows icon and select System.
- In the Settings window, under Related Settings , click Advanced System Settings.
- On the Advanced tab, click Environment Variables.
- In the User variables window, confirm that there is a variable for ANDROID_HOME and that the path matches the Android SDK Tools path from Unity. If it doesn’t exist, create the variable and paste the path that was copied from Unity.
- Edit the Path variable and add the ANDROID_HOME variable with platform-tools folder path at the end.
- Restart the machine.
Setup Project
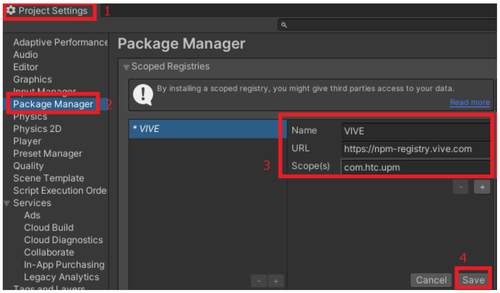
- From menu Edit-> Project Settings and Select Package Manager.
-
Input VIVE Registry
Name VIVE URL https://npm-registry.vive.com Scope com.htc.upm Note
All space in “URL” and “Scope(s)” must be trimmed
- Apply the change.
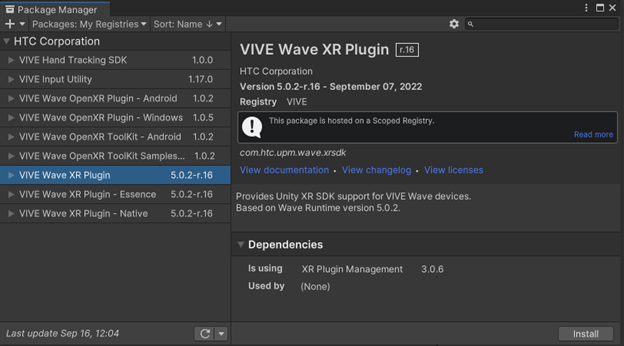
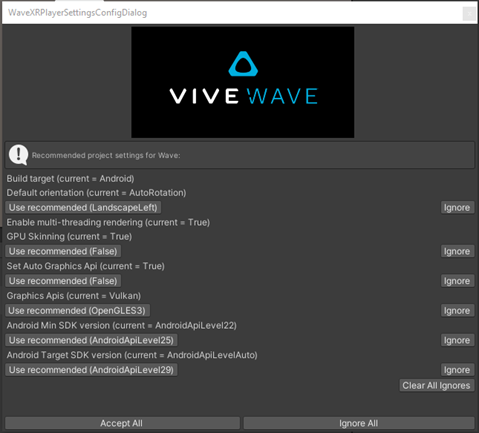
- From menu: Window-> Package Manager. Install VIVE Wave XR Plugin and click Accept All on the WaveXRPlayerSettingsConfigDialog.
Project Settings
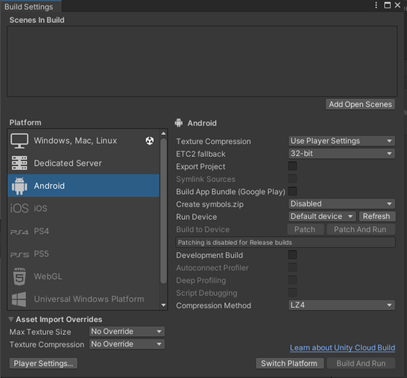
- In File-> Build Settings, the target platform needs to be set to Android. Click on Switch Platform.
- From menu: Edit-> Project Settings-> XR Plug-in Management, switch to Windows, Mac and Linux settings tab and enable WaveXR.
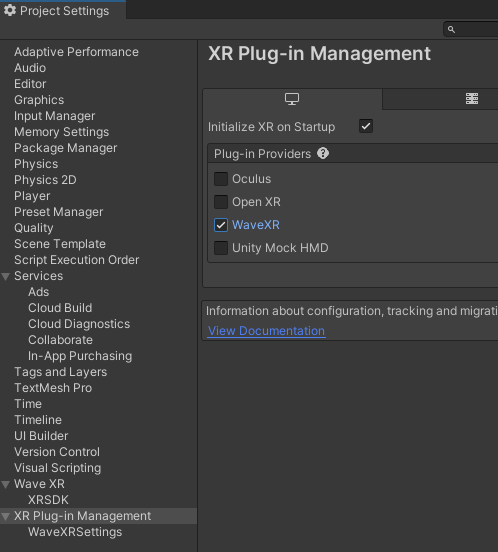
- From menu-> Wave-> DirectPreview-> EnableDirectPreview. DirectPreview is now enabled.

Create a test scene
- Add an XR Rig by right-clicking in the Hierarchy window and choose XR-> Convert Main Camera to XR Rig.
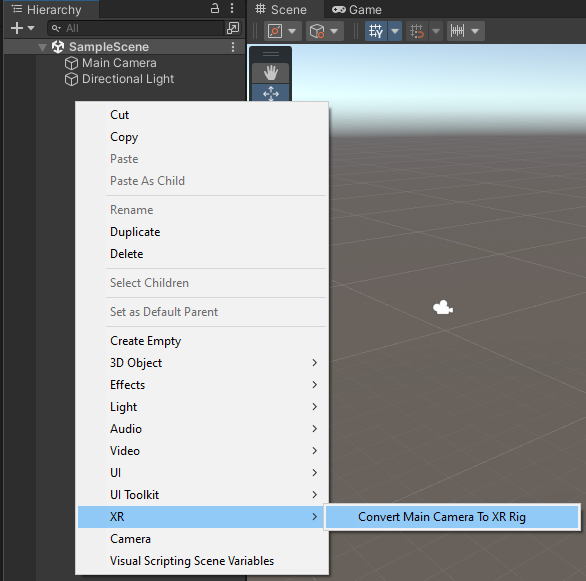
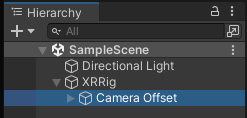
- Add a cube to the scene to use as a reference point to help determine if the preview is working properly.

For previewing via USB
- Connect the headset to the computer
- From menu-> Wave-> DirectPreview-> Control Panel

- In the DirectPreview window, set Connect Type to USB
- Click Install Device APK and then click Start Device APK
- Click Play in the Unity editor
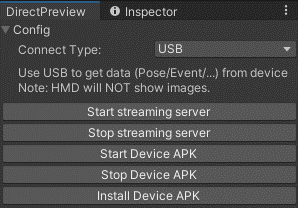
For previewing via Wi-Fi
- Connect the headset to the computer.
- From menu-> Wave-> DirectPreview-> Control Panel

- In the DirectPreview window, set Connect Type to Wi-Fi.
- Obtain the headset’s IP address by going to Settings-> General-> About-> Headset Status.
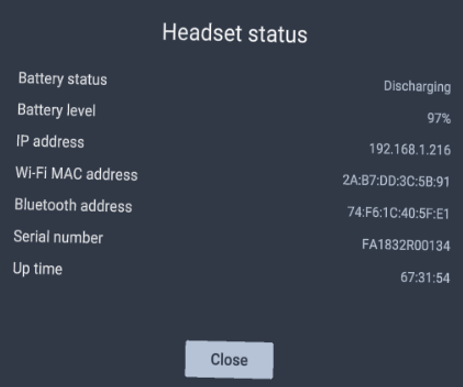
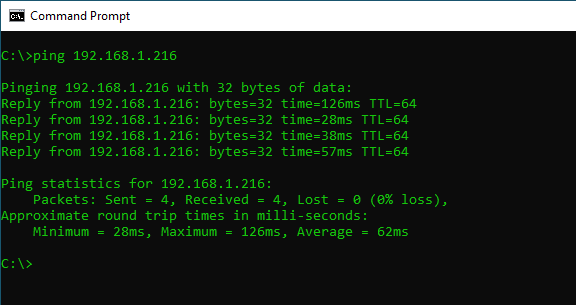
- Confirm the headset is connected to the same Wi-Fi network as the computer and that the headset is reachable by opening up a command prompt and pinging the headset’s IP address.
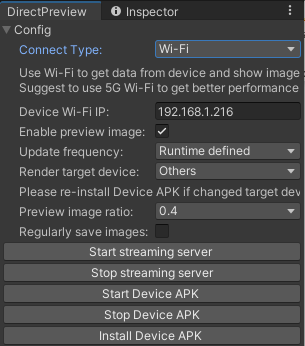
- Add the headset’s IP address to the Device Wi-Fi IP text box in the DirectPreview window
- Place a checkmark in the Enable preview image box, which is only supported over Wi-Fi
- Click Install Device APK and then click Start Device APK
- Click Start Streaming Server and you should see a command prompt that will automatically display and close
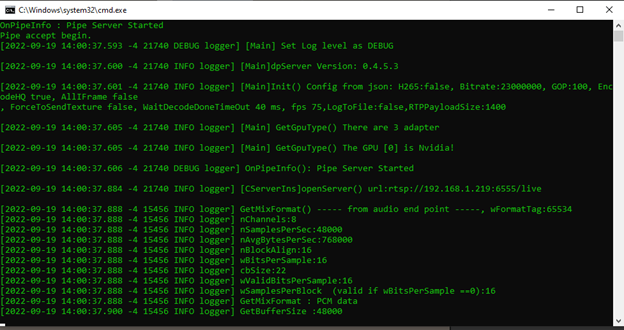
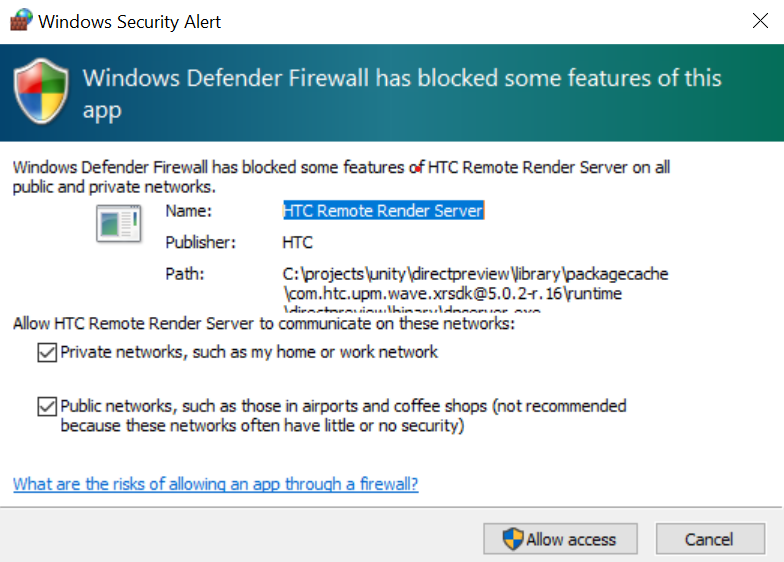
- If you receive a prompt from Windows Defender Firewall regarding the HTC Remote Render Server , then place a checkmark in all of the boxes and click Allow access.
- Click Play in the Unity editor