VIVE OpenXR Plugin installation
- ViveOpenXR Plugin is a Game Plugin (Project Plugin).
- Download and extract vive_openxr_plugin_<version>.zip
- Copy and paste ViveOpenXR to <Your Project Folder>\Plugins\ such as <Your Project Folder>\Plugins\ViveOpenXR (Create a directory named “Plugins” if the project doesn’t have.)
- Click Edit > Plugins , Vive OpenXR should be in the INSTALLED > Virtual Reality . Please relaunch the editor if the Vive OpenXR is not in the Plugins list.

-
For AIO projects, follow the steps below to setup Android Environments and project settings .
i. Refer to Setting up Android SDK and NDK for Unreal to set up Android Environments. You might need to manually target the Location of Android SDK and NDK in Project Settings > Platforms > Android SDK if you did not install Android SDK at the default path.

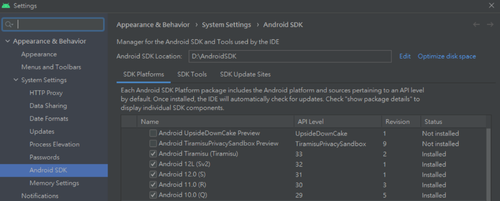
ii. For the Location of Android SDK. Go to Tools > SDK Manager in Android Studio Editor and navigate to Appearance & Behavior > System Settings > Android SDK. The Android SDK Location is the path to be filled.

iii. Fill your Android NDK ( 25.1.8937393 ) path to it for both UE5.2 and UE5.3 . The NDK can be downloaded from the Android SDK. Click the tab SDK Tools and select Show Package Details at the bottom right of the page to see the options.
iv. Make sure the following project settings are set. We assumed you migrate your scene to Virtual Reality project which Epic Games offered. You can refer to other settings in Virtual Reality project that we didn’t mention below.
Enable Support Vulkan .

Disable Show launch image to get rid of the non-stereo splash while launching app .

-
Check Edit > Plugins > Built-in > Virtual Reality . Make sure OpenXR is enabled but keep SteamVR and OculusVR disabled.
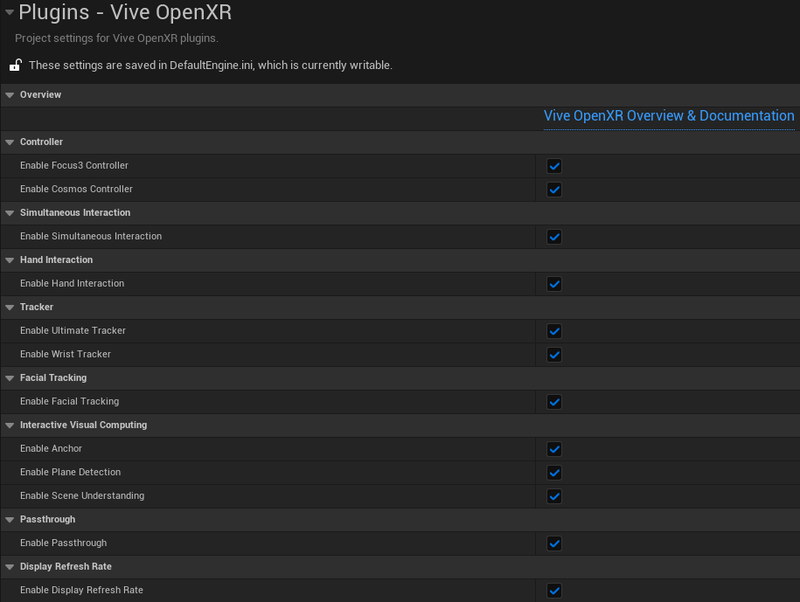
- Navigate to Edit > Project Settings > Plugins > Vive OpenXR for checking these OpenXR extensions ViveOpenXR provided. Remember to restart the editor for the changes to take effect.
