Realistic Hand Interaction (Beta)
VIVE OpenXR plugin offers the Realistic Hand Interaction feature.
The imported prefabs and samples are located in Packages VIVE OpenXR Plugin > Runtime > Toolkits > RealisticHandInteraction(experimental).
Supported Platforms and Devices
| Platform | Headset | Supported | Plugin Version | |
| PC | PC Streaming | Focus 3/XR Elite/Focus Vision | X | |
| Pure PC | Vive Cosmos | X | ||
| Vive Pro series | X | |||
| AIO | Focus 3/XR Elite/Focus Vision | V | 2.3.0 and above | |
Specification
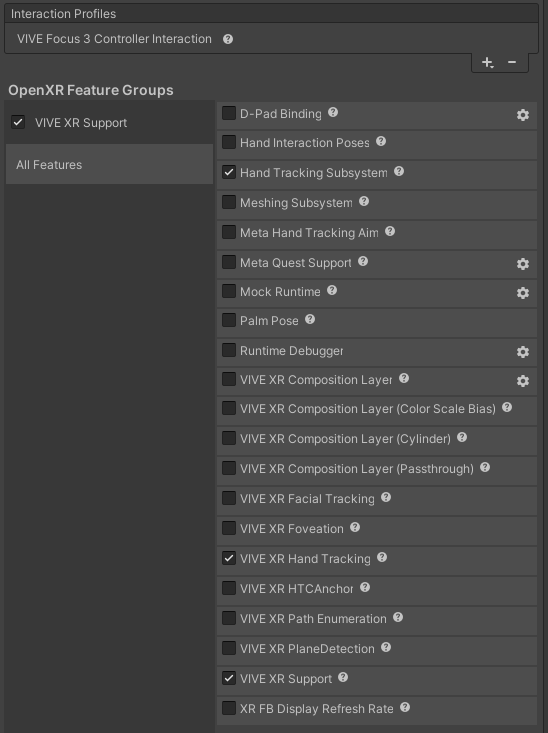
The VIVE OpenXR Unity plugin supports Realistic Hand Interaction with Unity XR Hands. This functionality relies on the Hand Tracking Subsystem, which requires the OpenXR feature group to be enabled.
Environment Settings
Before using Realistic Hand Interaction, make sure to install Unity XR Hands and checking Hand Tracking Subsystem in OpenXR Settings from Edit > Project Settings > XR Plug-in Management > OpenXR.
Due to some issues with Unity XR Hands on PC, it is not recommended to use Realistic Hand Interaction on PC.
Golden Sample
The Realistic Hand Interaction feature contains two main components: HandGrabInteractor and HandGrabInteractable.
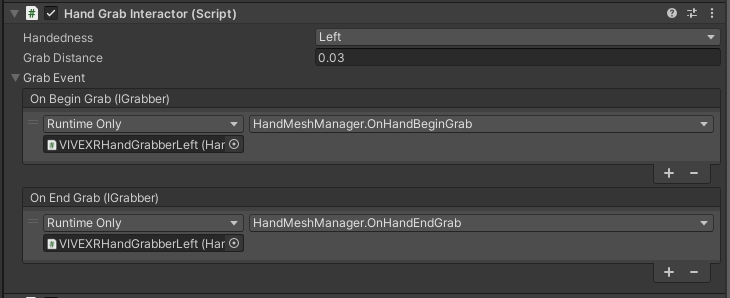
The HandGrabInteractor updates hand tracking data and allows grabbing at gameobjects with the HandGrabInteractable component.
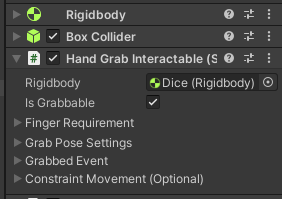
The HandGrabInteractable component allows gameobjects to be grabbable. Currently, only gameobjects with at least one 3D Collider component are supported.
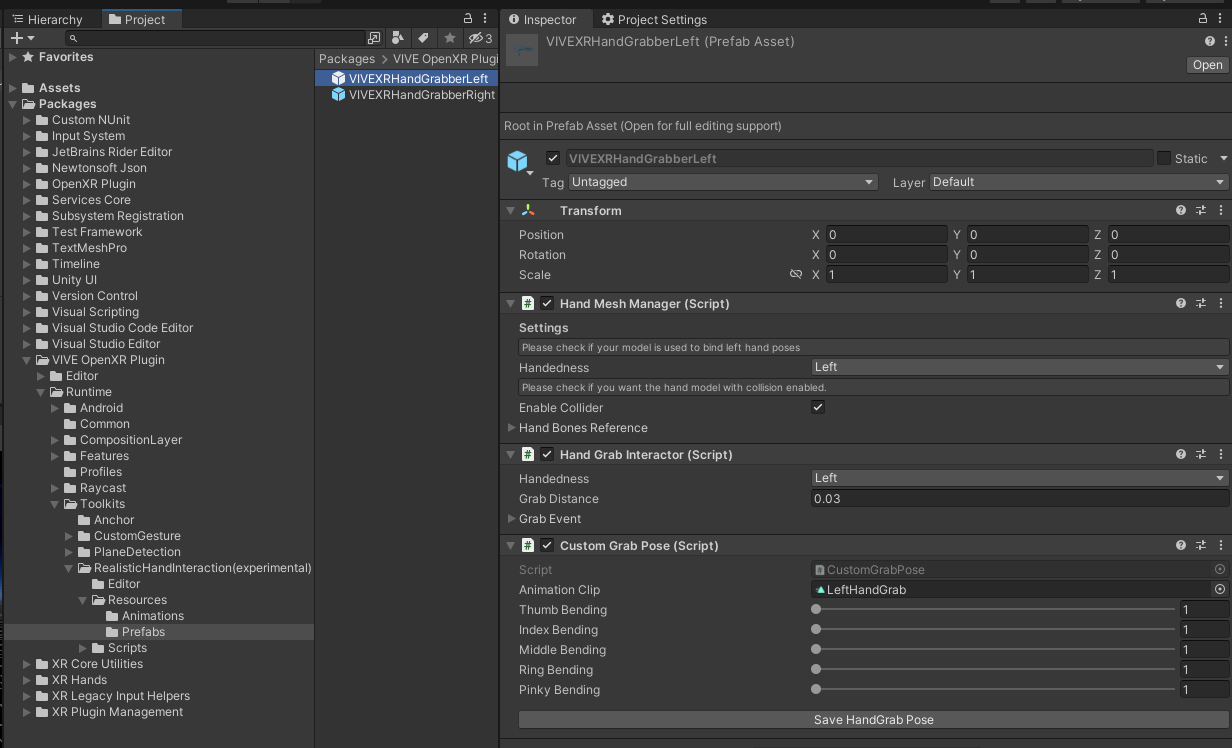
These prefabs include left and right hand grabbers, which you simply need to place into your scene.
Each prefab comes with a hand mesh, hand grabber and custom grab pose.
How to Use Realistic Hand Interaction
Common Use
Only gameobjects with the HandGrabInteractor component are capable of grabbing gameobjects with the HandGrabInteractable component.
- Add HandGrabInteractor and modify the script options if needed.
-
Handedness: Set the hand for hand tracking. -
Grab Distance: Set the grabbing distance. -
Grab Event: Send event when beginning and ending grab. - Add HandGrabInteractable to gameobject with collider or its children have.
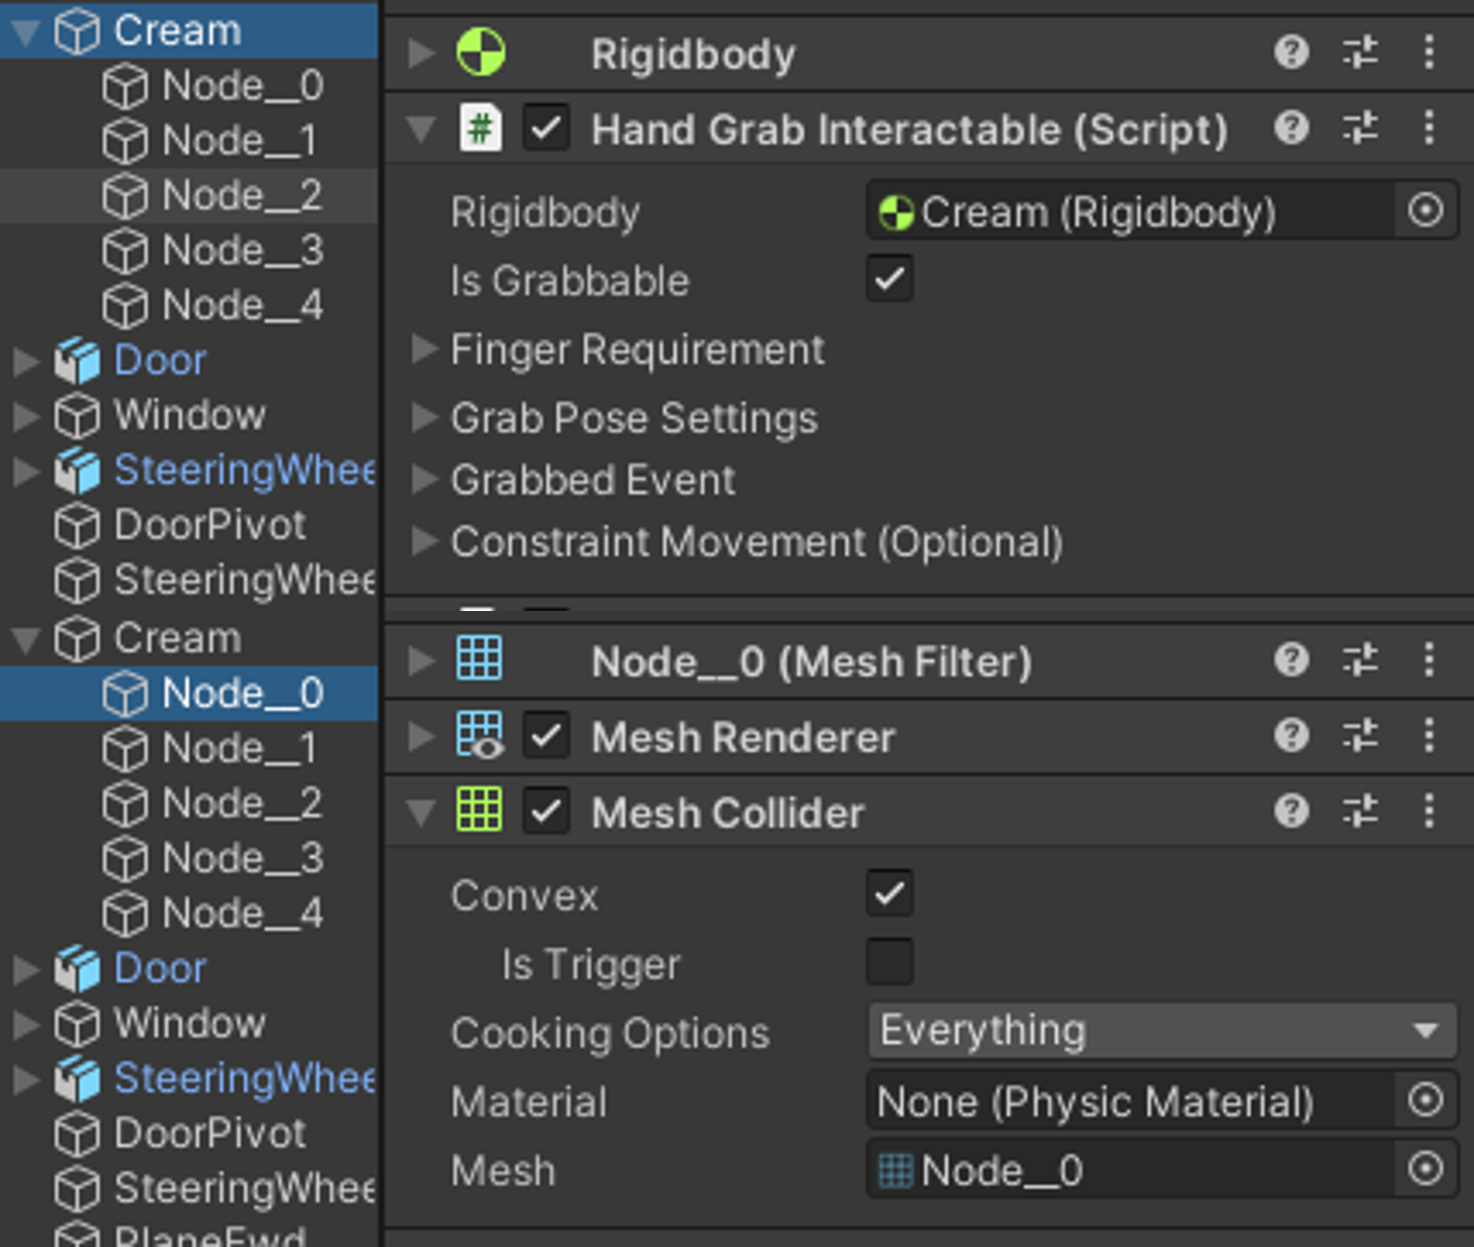
- If gameobject with collider.
- If gameobject without collider but its children have.
-
Rigidbody: The rigidbody of this object. -
Is Grabbable: Allow oneself to be grabbed. -
Finger Requirement: Define which fingers are required for grabbing. -
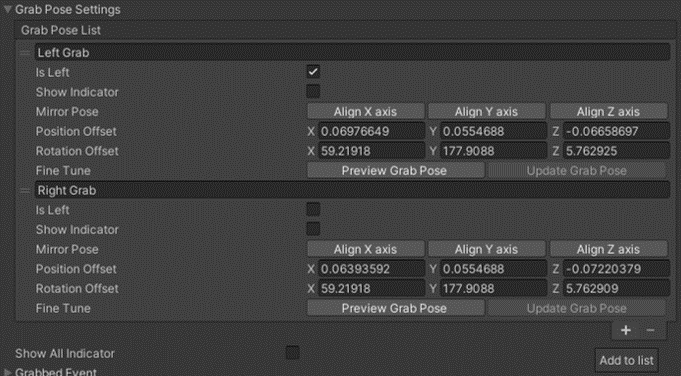
Grab Poses Settings: Define the hand gestures for grabbing. -
Grabbed: Send event when the object is grabbed and released. -
Constraint Movement (Optional): Constraint the object's movement and rotation. - Set the
Finger requirementon the HandGrabInteractable of the gameobject, and then build and run to test. - Ignored: This finger is not needed for grabbing.
- Optional: This finger can be used for grabbing.
- Required: This finger is required for grabbing.
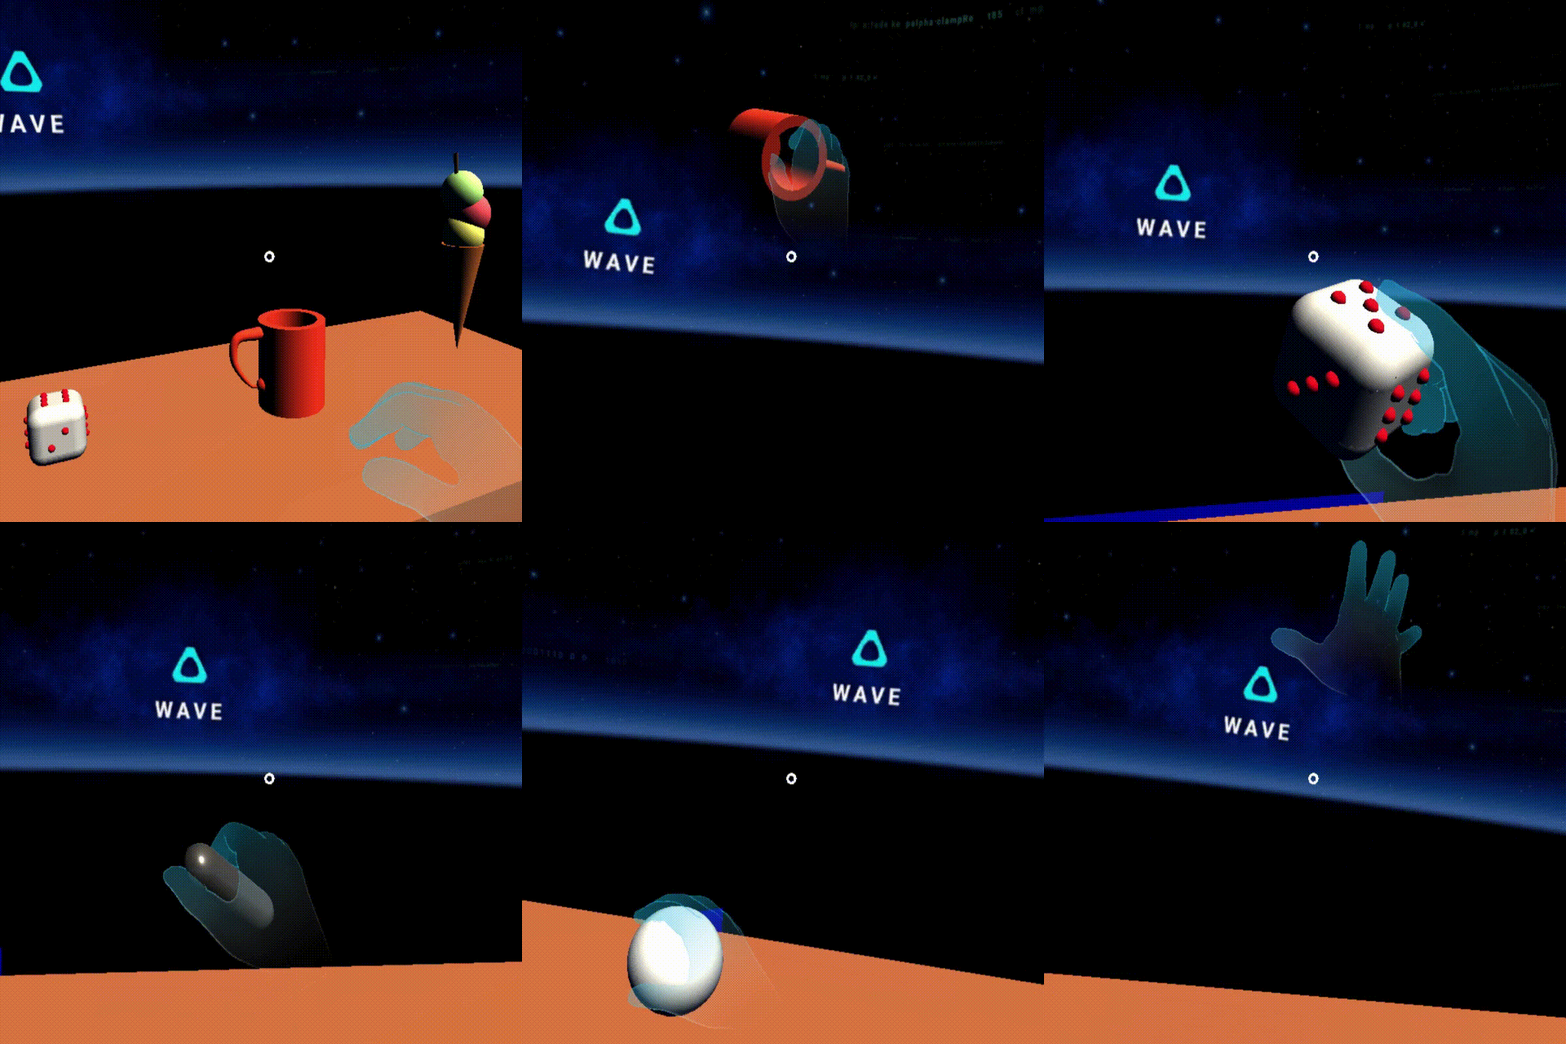
Throw the gameobject (Script)
If you want objects to experience inertia when thrown, you can add this component.
- Add component PhysicsInteractable to the gameobject with HandGrabInteractable.
- Add
OnBeginInteractabledandOnEndInteractabledof the PhysicsInteractable to theGrabbed Eventof the HandGrabInteractable.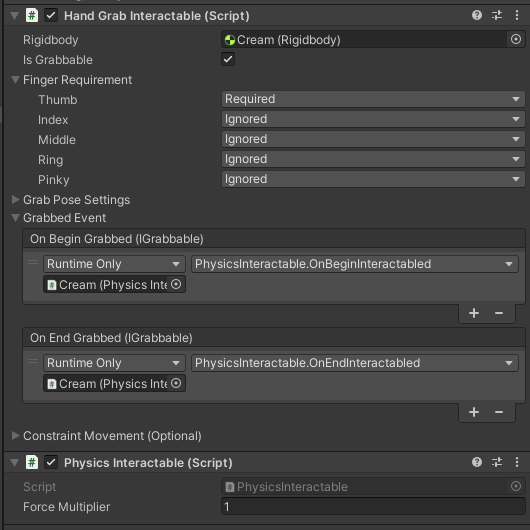
- Set
ForceMultiplierto determine the force applied when throwing. - After setting the PhysicsInteractable:
Additional Use
Align the hand mesh with the gameobject by using the Grab Pose
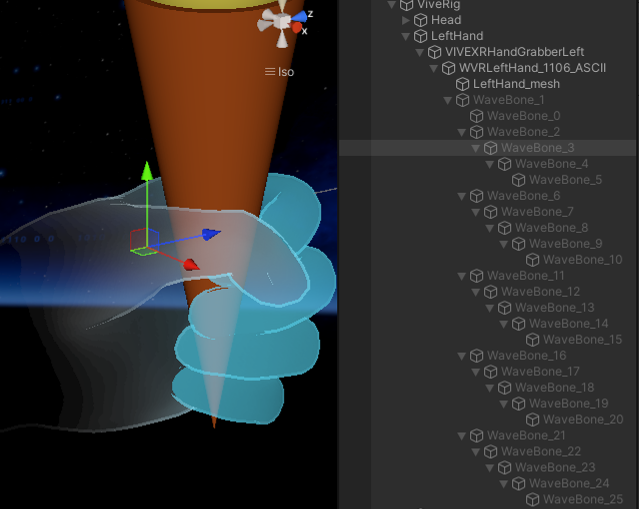
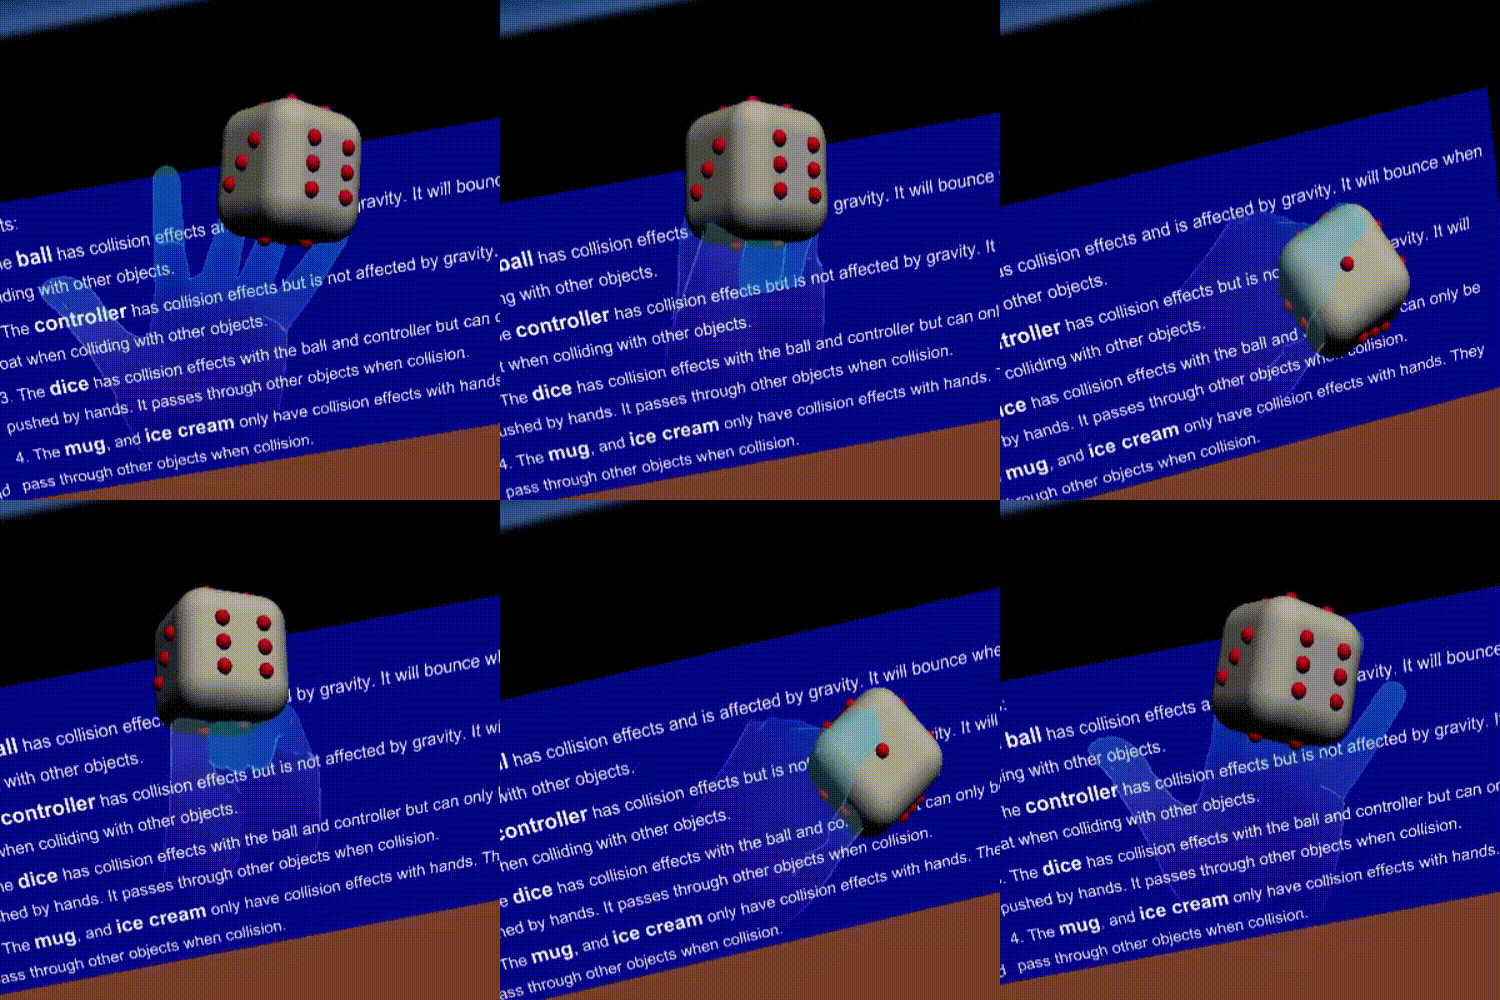
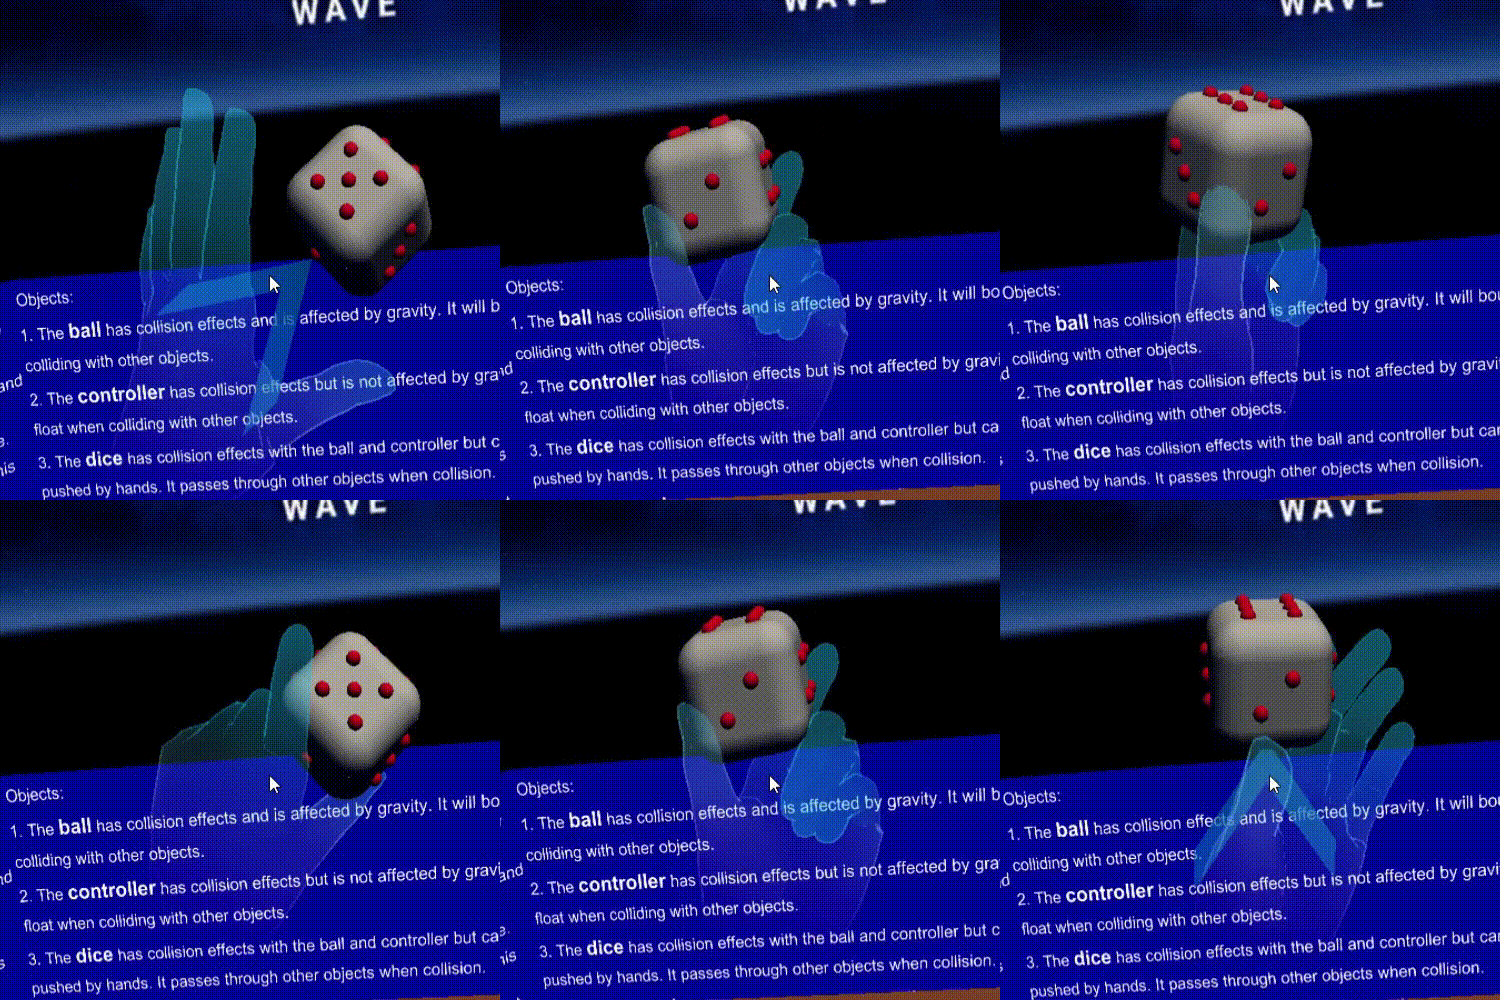
When grabbing the gameobject, the hand mesh may overlap with the gameobject. To achieve a more realistic grabbing effect, you can customize the grab pose. This needs to be done in the Unity Editor play mode. Once completed, the grab pose will be saved in the Grab Pose Settings of the gameobject. As a result, the gameobject will be grabbed according to the customized grab pose during grabbing.
Here shows the before-and-after comparison of setting the Grab pose.
Before setting the Grab pose:
After setting the Grab pose:
Customized Grab Pose (Script)
- Add component CustomGrabPose to the gameobjects with HandMeshManager.
- Disable
Enable Colliderof the HandMeshManager component.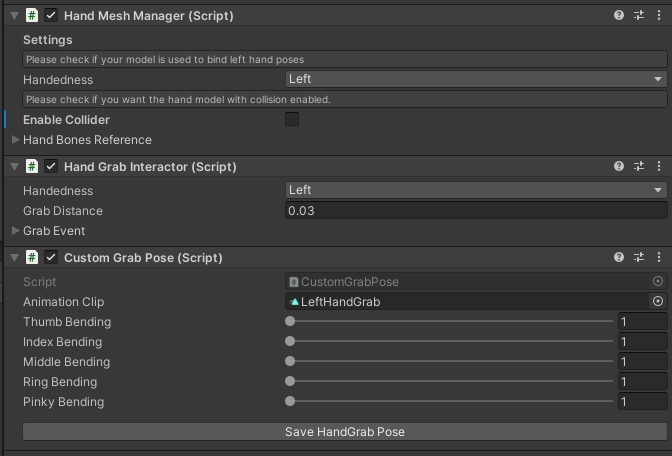
- In Unity Editor, starting the play mode and set the position of the hand model and the gameobject at the same location.
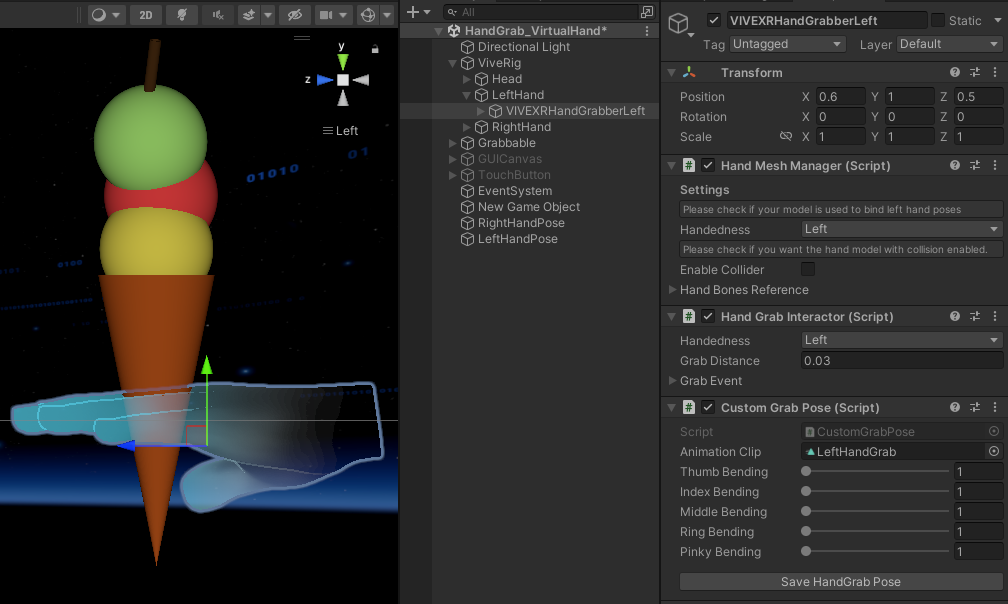
- Modify the bending value of each fingers of the CustomGrabPose and adjust the position of the hand model or the gameobject until it matches your expectation.
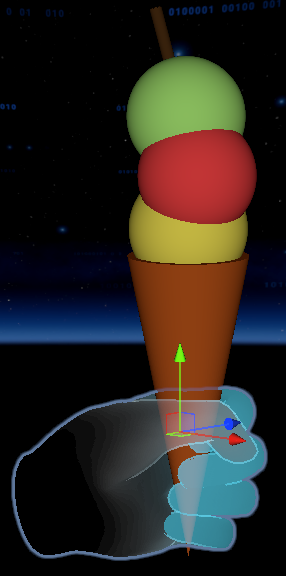
- Click "Save HandGrab Pose" of the CustomGrabPose before stopping the play mode.
- Check the
Grab Poses settingsof the HandGrabInteractable on the gameobject. It should updated.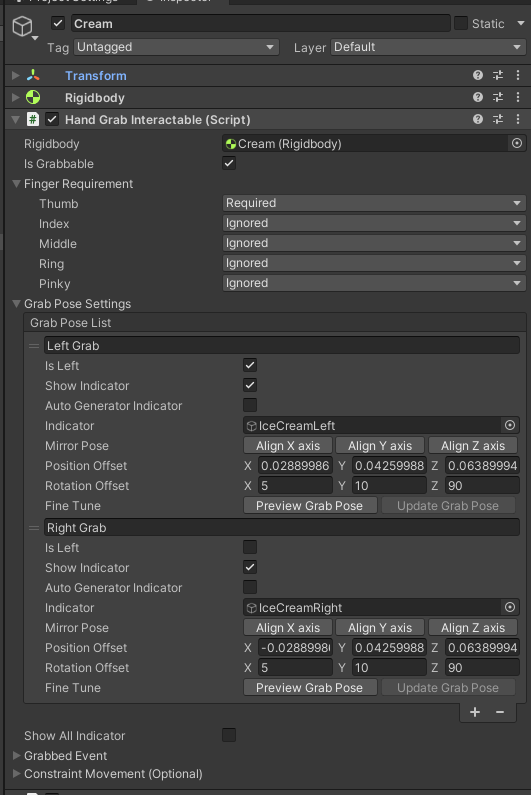
Tip1: Fine-tune the grab pose
1. You can click thePreview Grab Poseof the HandGrabInteractable under the play mode.
2. Expand all the game objects in the Hand model and adjust their rotation values until they match your expectation.
3. Finally, clickUpdate Grab Poseof the HandGrabInteractable to update the grab pose before stopping play mode.Tip2: Duplicate to other hand
1. You can click the "+" button ofGrab Poses settingsto create a duplicate.
2. Click "IsLeft" to toggle between left and right hand grabbing.
3. Click the Mirror Pose "Align X axis", "Align Y axis", and "Align Z axis" will project the GrabPose onto the left-right, vertical, and front-back directions.
Physic Hand model
To achieve a more realistic effect, you enable Enable Collider of the HandMeshManager. If you enable Collider, the HandMeshManager will initialize a fixed-size collider (matching our default hand model), allowing it to interact physically with other 3D objects.
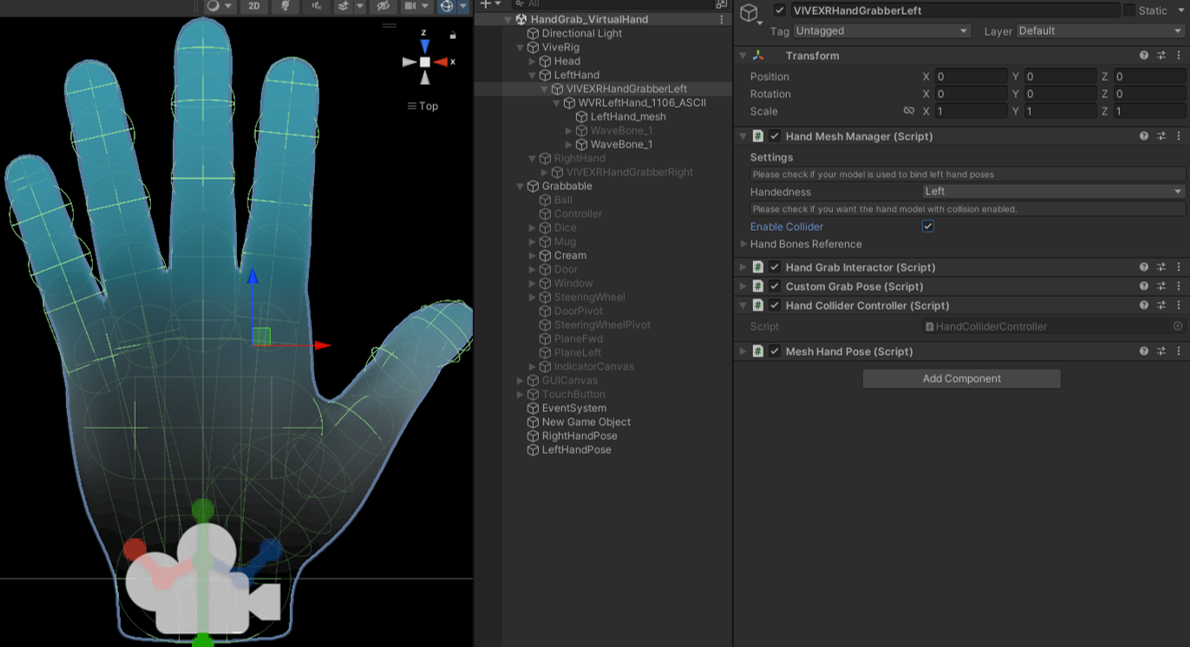
Constraint Interaction (Script)
For certain special objects, they may have limits on their movement or rotation, so constraint interaction is needed.
For movement restriction, you can use OneGrabMoveConstraint.
1. Add OneGrabMoveConstraint and set the object that needs to be constrained.
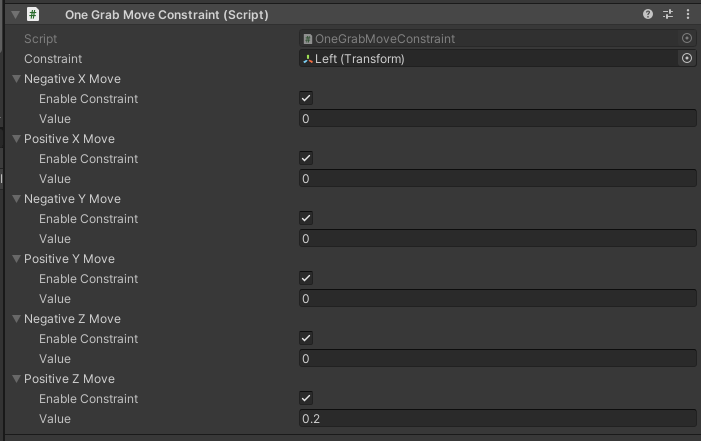
3. Drag OneGrabMoveConstraint to HandGrabInteractable's Constraint Movement; this will constraint its movement when grabbing.
For rotation restriction, you can use OneGrabRotateConstraint.
1. Add OneGrabRotateConstraint and set the object that needs to be constrained and the rotation pivot.
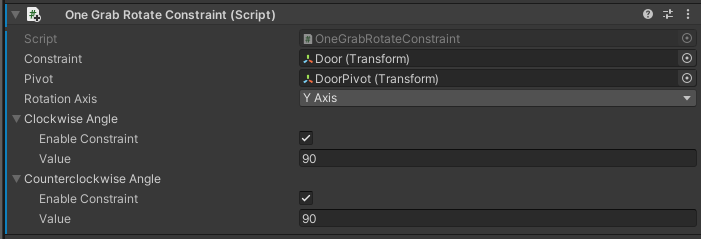
3. Drag OneGrabRotateConstraint to HandGrabInteractable's Constraint Movement; this will constraint its rotation when grabbing.
See Also
Open source project
- Realistic Hand Interaction API
